Welcome to Clamber
Building anticipation for your next product launch shouldn’t require complex infrastructure or expensive tools. Clamber is the waitlist management platform designed by developers, for developers – offering enterprise-grade care with the simplicity you deserve.
Whether you’re launching your first MVP or managing multiple product waitlists, this guide will walk you through everything you need to know to collect, manage, and engage with your early adopters effectively.
What Makes Clamber Different?
- Lightning-fast API responses + long lived caching for pro users
- Domain-bound security that helps mitigate bot spam
- Developer-friendly integration with clean JSON API
- Transparent pricing – start free, scale when you’re ready
- Your data, always accessible – export anytime, no lock-in
Getting Started with Clamber
Your First Steps
Starting with Clamber is refreshingly simple. We’ve eliminated the friction typically associated with enterprise tools while maintaining the security and reliability you need.
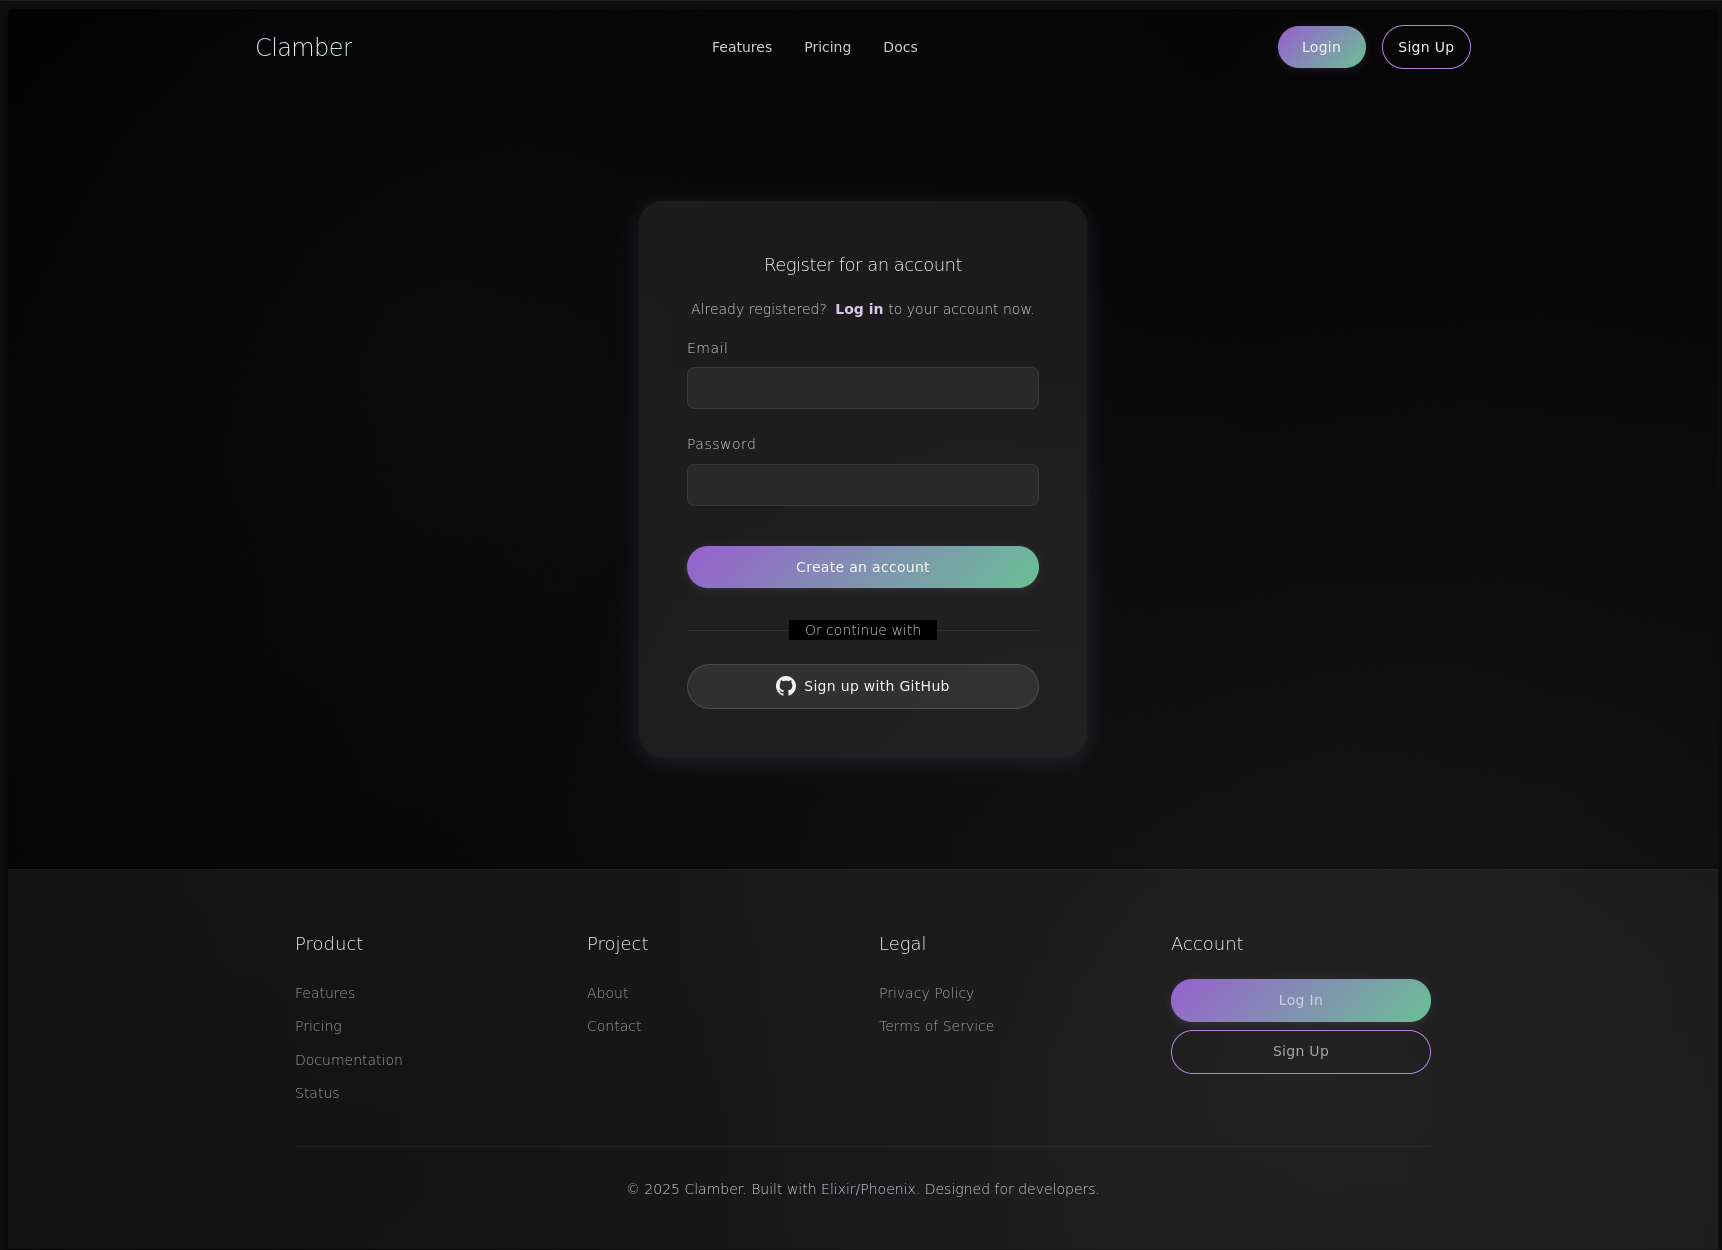
The Clamber homepage showing both GitHub OAuth and email sign-up options
Choosing Your Sign-Up Method
Option 1: GitHub OAuth (Recommended)
For developers who value speed and security, GitHub OAuth gets you started in seconds. Simply click “Continue with GitHub” and you’ll be redirected to GitHub’s secure authentication. Your profile information syncs automatically, and you’ll never need to manage another password.
Option 2: Email and Password
Prefer traditional authentication? Create an account with your email address and a strong password. We’ll send a confirmation link to verify your email – a crucial step that ensures the security of your account and your future contacts’ data.
Activating Your Account
Once you’ve verified your email (or authenticated with GitHub), you’ll land on your personal dashboard. This is your command center – where waitlists are born, contacts are managed, and insights emerge.
Your Free plan activates automatically, giving you immediate access to:
- Your first waitlist
- Up to 50 contacts
- Full API access
- CSV export capabilities
- 10 customizable fields per contact
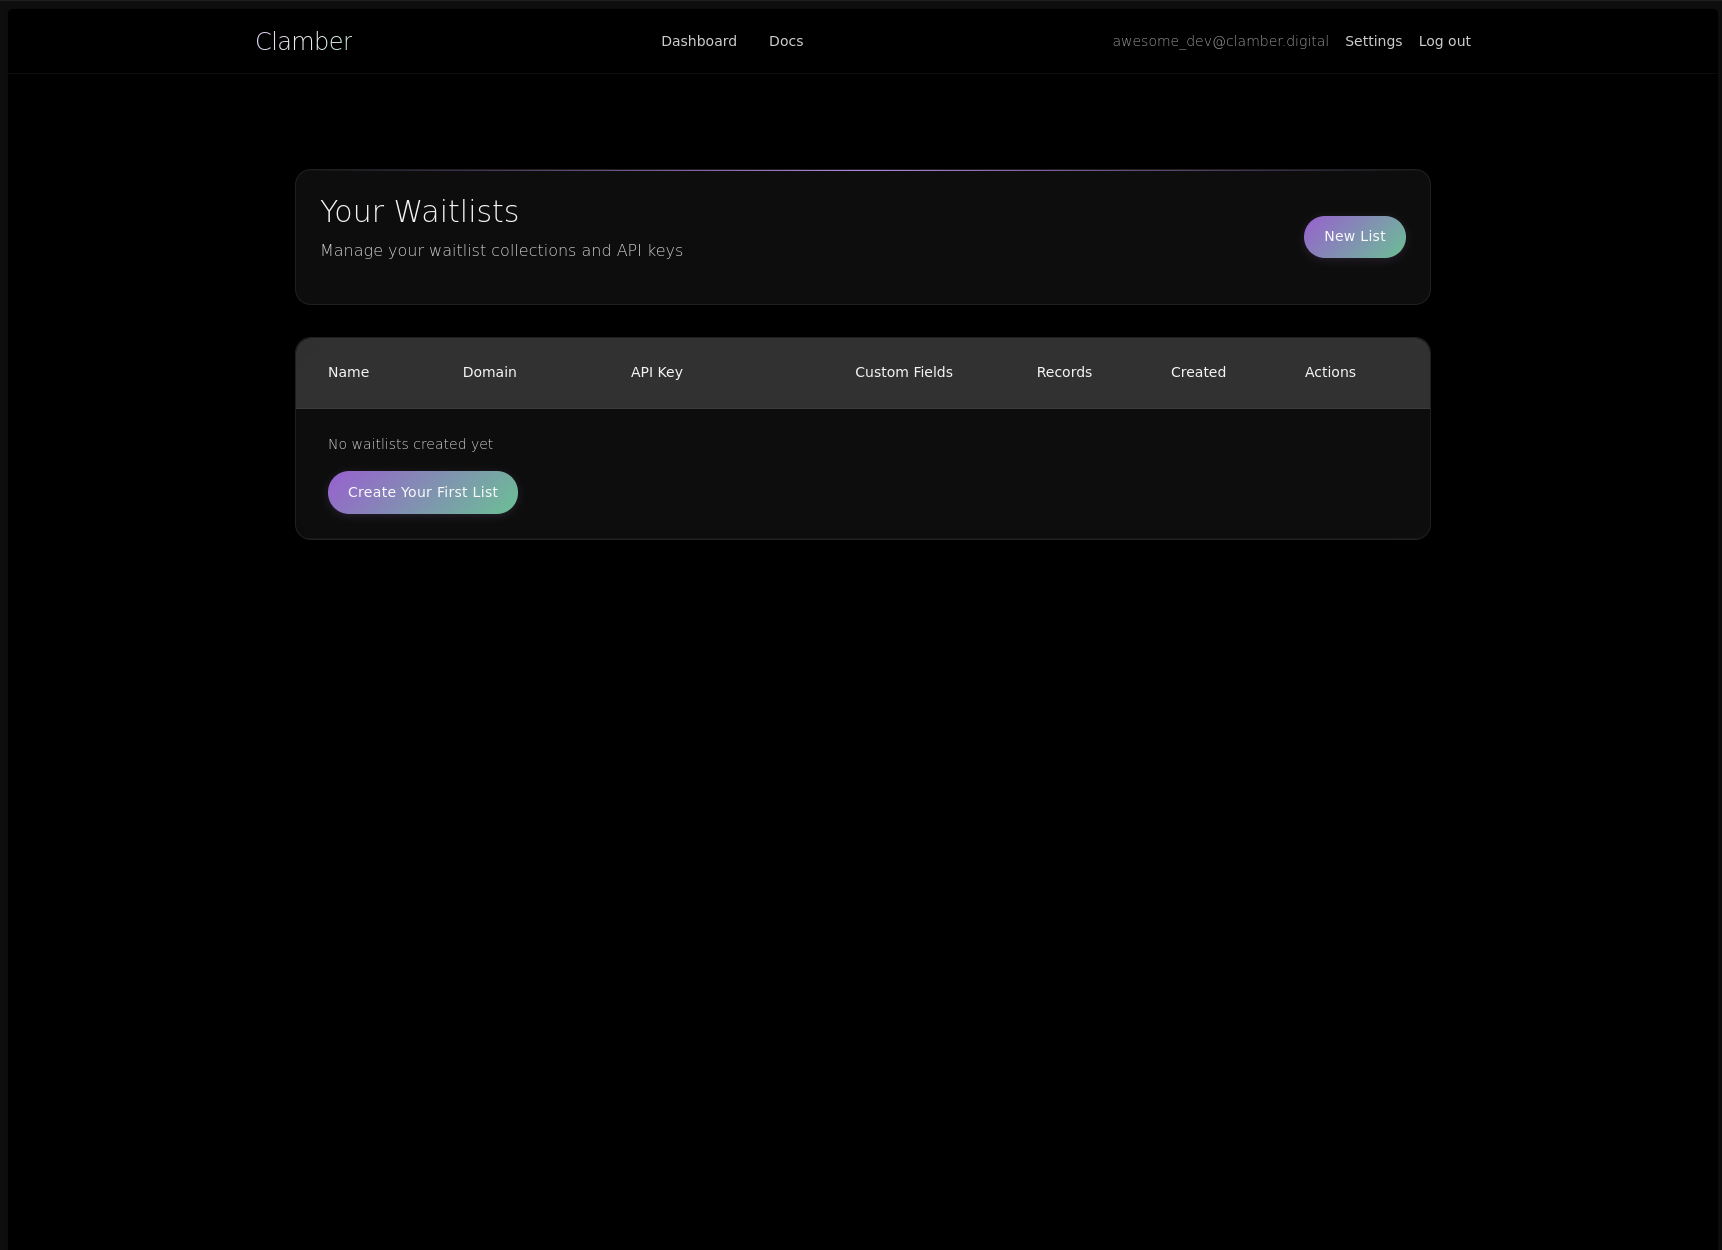
Your fresh dashboard with a welcoming message and clear call-to-action to create your first waitlist
Understanding Your Dashboard
The dashboard is designed for clarity and efficiency. At a glance, you can see:
- Active Waitlists: Each with its contact count and growth metrics
- Recent Activity: The latest signups across all your lists
- Usage Indicators: Visual progress bars showing your plan limits
- Quick Actions: One-click access to create, export, and manage
The interface uses a modern glassmorphic design – those subtle translucent cards aren’t just beautiful, they’re functional, creating visual hierarchy without overwhelming your senses.
Managing Your Account
Security First, Always
Your account security isn’t just about protecting your login – it’s about safeguarding the trust your future customers place in you when they join your waitlist.
To protect this data we maintain audit logs of sessions and OAuth attempts for compliance purposes.
For GitHub OAuth Users
If you chose GitHub authentication, you’re already benefiting from:
- GitHub’s robust two-factor authentication (if enabled on your GitHub account)
- Automatic profile synchronization
- No password to manage or potentially compromise
- Audit trails of every authentication event
Your GitHub details are found in the settings, a reminder of the seamless integration between platforms.
For Email/Password Users
Traditional authentication doesn’t mean poor security. We’ve implemented:
- Account lockout protection: Automatic protection against brute force attempts
- Security notifications: Instant alerts for suspicious activity
- Password reset: Secure, token-based recovery via email
The password change interface with strength indicator and requirements clearly displayed
Monitoring Account Activity
Your Settings page includes a comprehensive security log showing:
- Login timestamps and IP addresses
- Failed login attempts
- Password changes
- API key rotations
- Plan changes
This transparency ensures you always know who’s accessing your account and when.
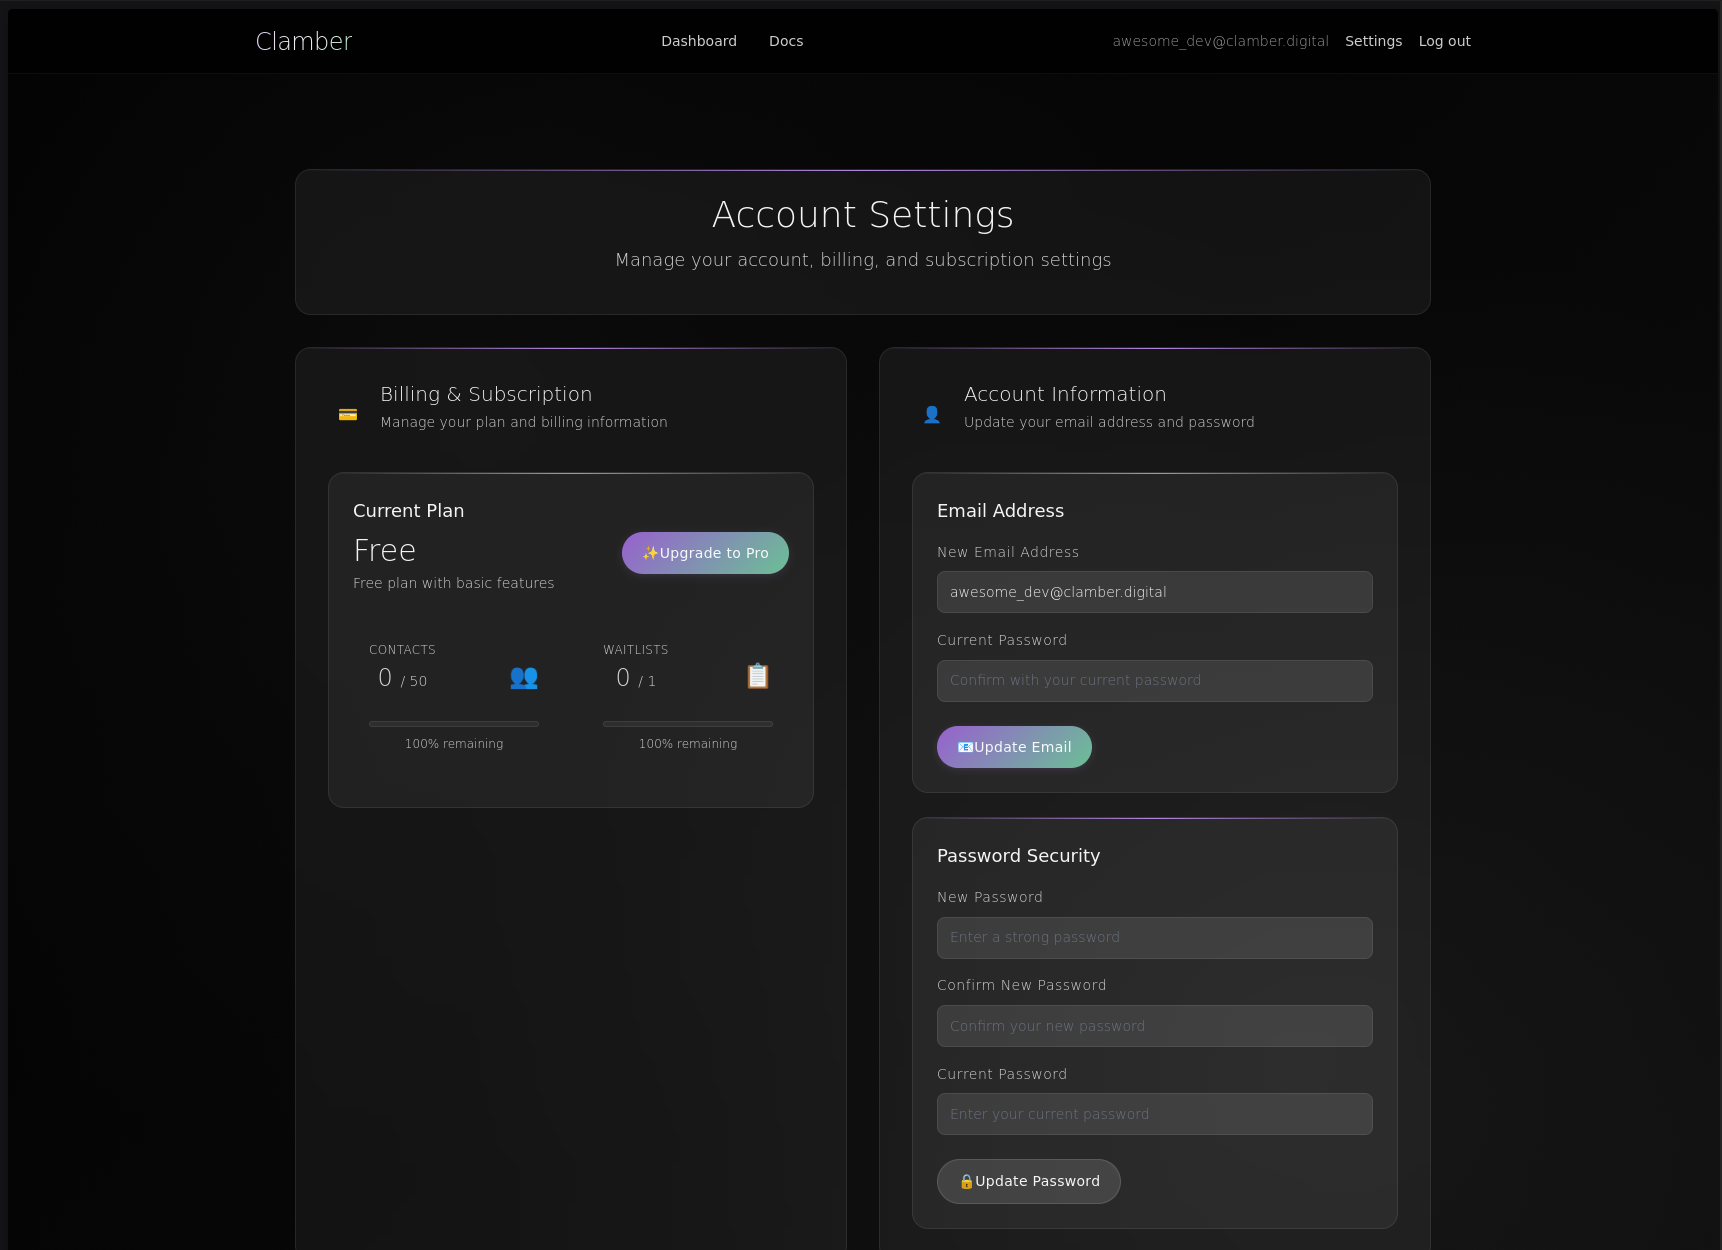
Understanding Plans and Limits
The Free Plan: Perfect for Starting Out
Every journey begins with a single step, and our Free plan ensures that step doesn’t cost you anything.

A dashboard showing Free plan limits with progress bars indicating 0/50 contacts used
The Free plan is genuinely useful, not a crippled trial:
- One complete waitlist with all features enabled
- 50 contacts – enough to validate initial interest
- Full API access – no feature restrictions
- CSV exports – your data, always portable
- 10 custom fields – capture the information you need
You’ll see elegant progress indicators throughout the interface, showing exactly how close you are to your limits. No surprises, no hidden restrictions.
The Pro Plan: Ready to Scale
When your idea gains traction (and it will), upgrading to Pro removes all barriers to growth.

A visual comparison showing Free vs Pro features with emphasis on “unlimited” capabilities
For €10 per month, Pro delivers:
- Unlimited waitlists – manage multiple products or segments
- Unlimited contacts – grow without worry
- Priority support – direct access to our team
- Advanced analytics – understand your audience deeply (coming soon)
- All Free features – nothing gets taken away
Upgrading: A Seamless Experience
The upgrade process respects your time and intelligence:
- Navigate to Settings from your dashboard
- Click the “Upgrade to Pro” button
- Complete checkout via Stripe (industry-standard security)
- Instant activation – no waiting, no manual approval
We use a secure integration with Stripe so their systems are handling your payment data. It never touches our servers. So you can have faith that the details are protected.
Your existing data transitions seamlessly. Those 50 contacts on your Free plan? They’re still there, ready to be joined by thousands more.
Billing Transparency
We believe in honest, predictable pricing:
- Monthly billing on the same date each month
- No setup fees or hidden charges
- Cancel anytime with data retention for 7 days
- Automatic receipts for your records
You can manage your subscription via Stripe. Or reach out to us at any time for further support.
Creating and Managing Waitlists
Your First Waitlist: Setting the Foundation
Creating a waitlist is a moment of possibility – the first concrete step toward your launch. We’ve made this process both quick and approachable.
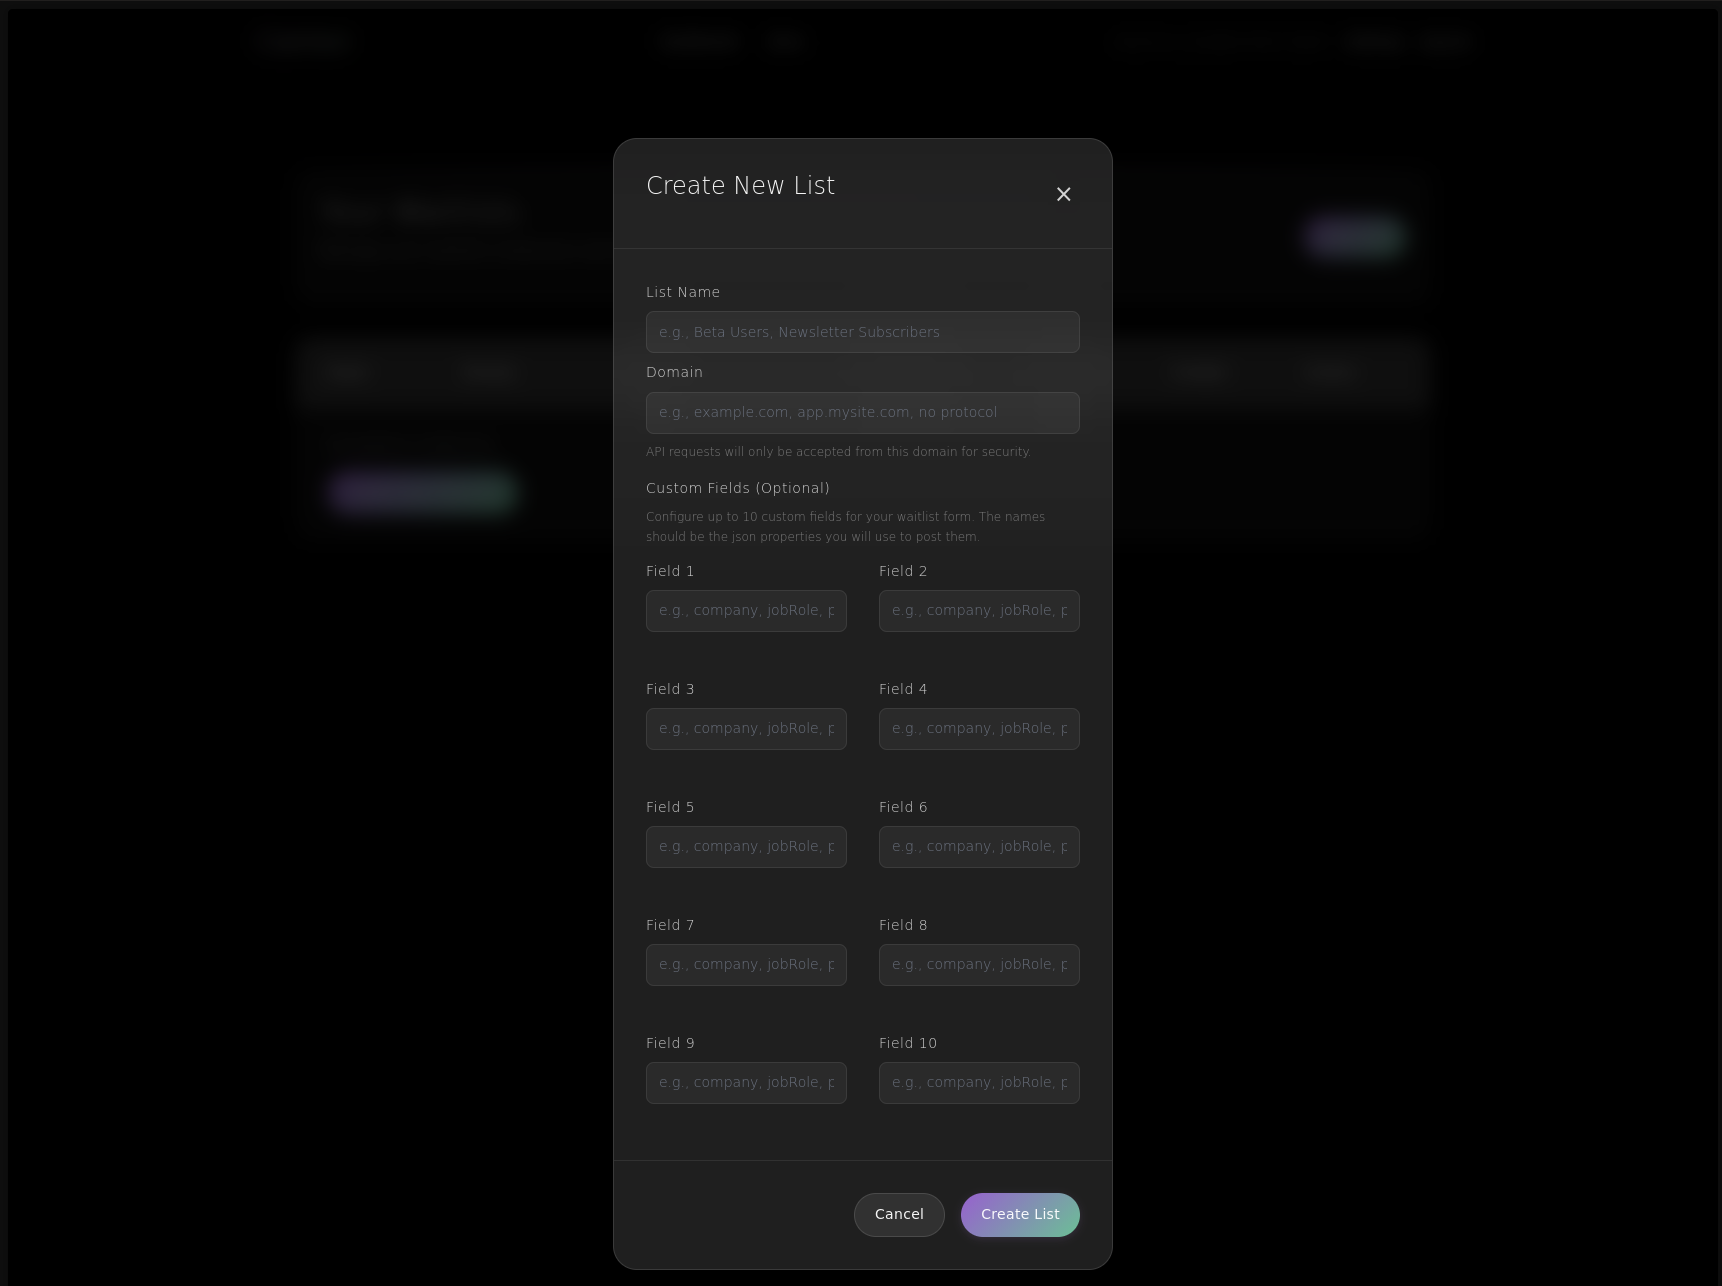
The waitlist creation form with fields for name and domain, plus helpful tooltips
Naming Your Waitlist
Choose a name that means something to you and your team. This is internal-facing, so be descriptive:
- ✅ “SaaS Tool Beta Launch 2025”
- ✅ “Mobile App Early Access”
- ✅ “E-commerce Platform Founders”
- ❌ “List 1” (too generic)
Setting Your Domain
The domain field is crucial. This should be the domain where your signup form will live:
-
If your landing page is
https://myproduct.com, entermyproduct.com -
If using a subdomain like
https://beta.myproduct.com, enterbeta.myproduct.com - Subdomains are treated as separate domains for security
Important: The domain cannot be changed after creation. This immutability ensures the cryptographic binding between your API key and domain remains secure.
As the API keys for these are designed to be safe to share publically, we have implemented checks on the origin. Though this isn’t a perfect solution it is designed to prevent bot spam.
The keys can also be hidden in a backend, to further prevent spam.
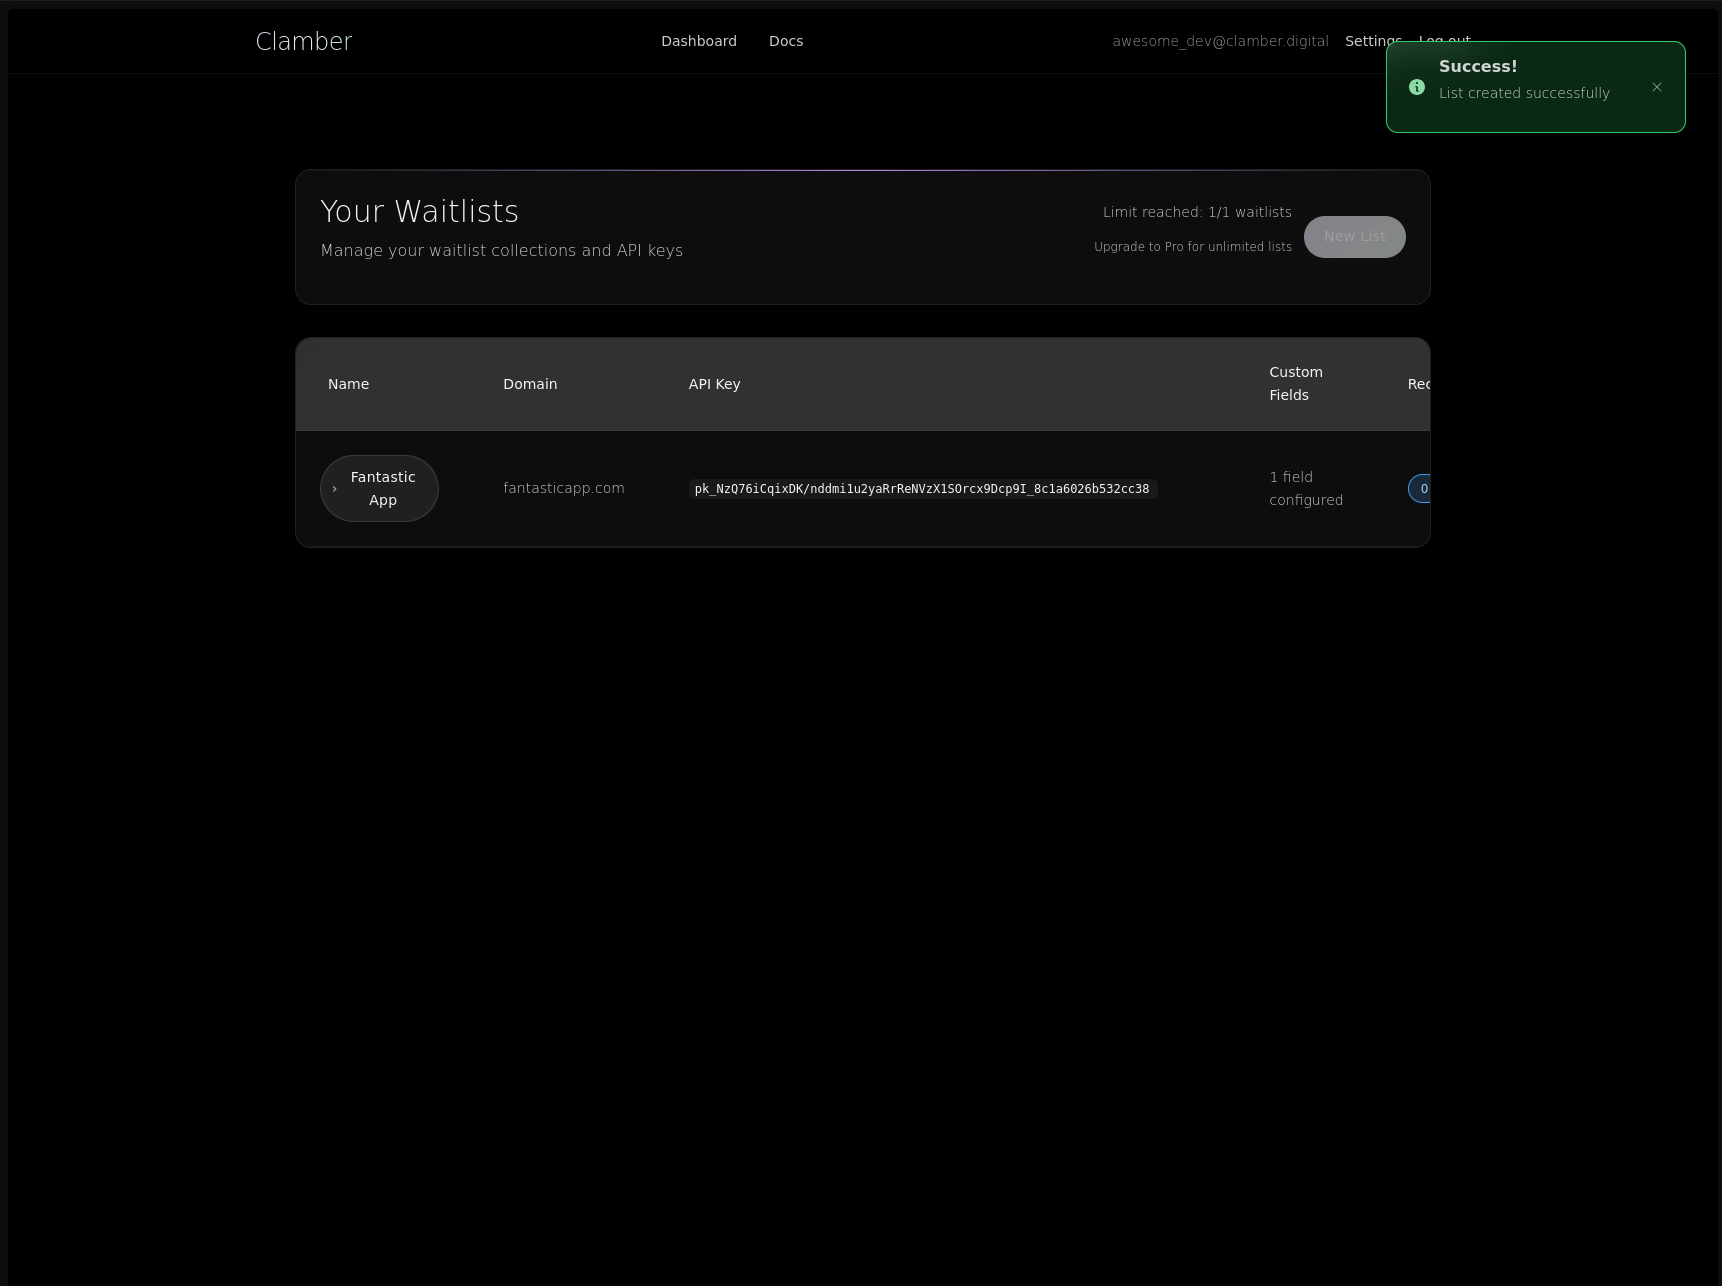
Success message showing the newly created waitlist with its API key partially visible
Managing Multiple Waitlists (Pro Plan)
As a Pro user, you might manage waitlists for different purposes:
- Product variants or tiers
- Geographic regions
- Customer segments
- A/B testing different value propositions
Each waitlist maintains complete independence:
- Separate API keys
- Individual custom field configurations
- Independent contact lists
- Isolated analytics
The Waitlist Lifecycle
Understanding how your waitlist evolves helps you make better decisions:
1. Creation Phase
- Configure custom fields
- Set up your domain
- Generate your API key
2. Growth Phase
- Monitor signups in real-time
- Track conversion sources
- Adjust custom fields based on needs
3. Export Phase
- Download your contacts
- Import into email marketing tools
- Begin engagement campaigns
4. Archive Phase (Optional)
- Preserve the list for historical reference
- Or delete if no longer needed
Editing or Deleting Lists
Even if you have already saved your list, you can edit the custom fields. But not the domain. You can also delete the list.
This menu is found by scrolling the across to the end of the table.
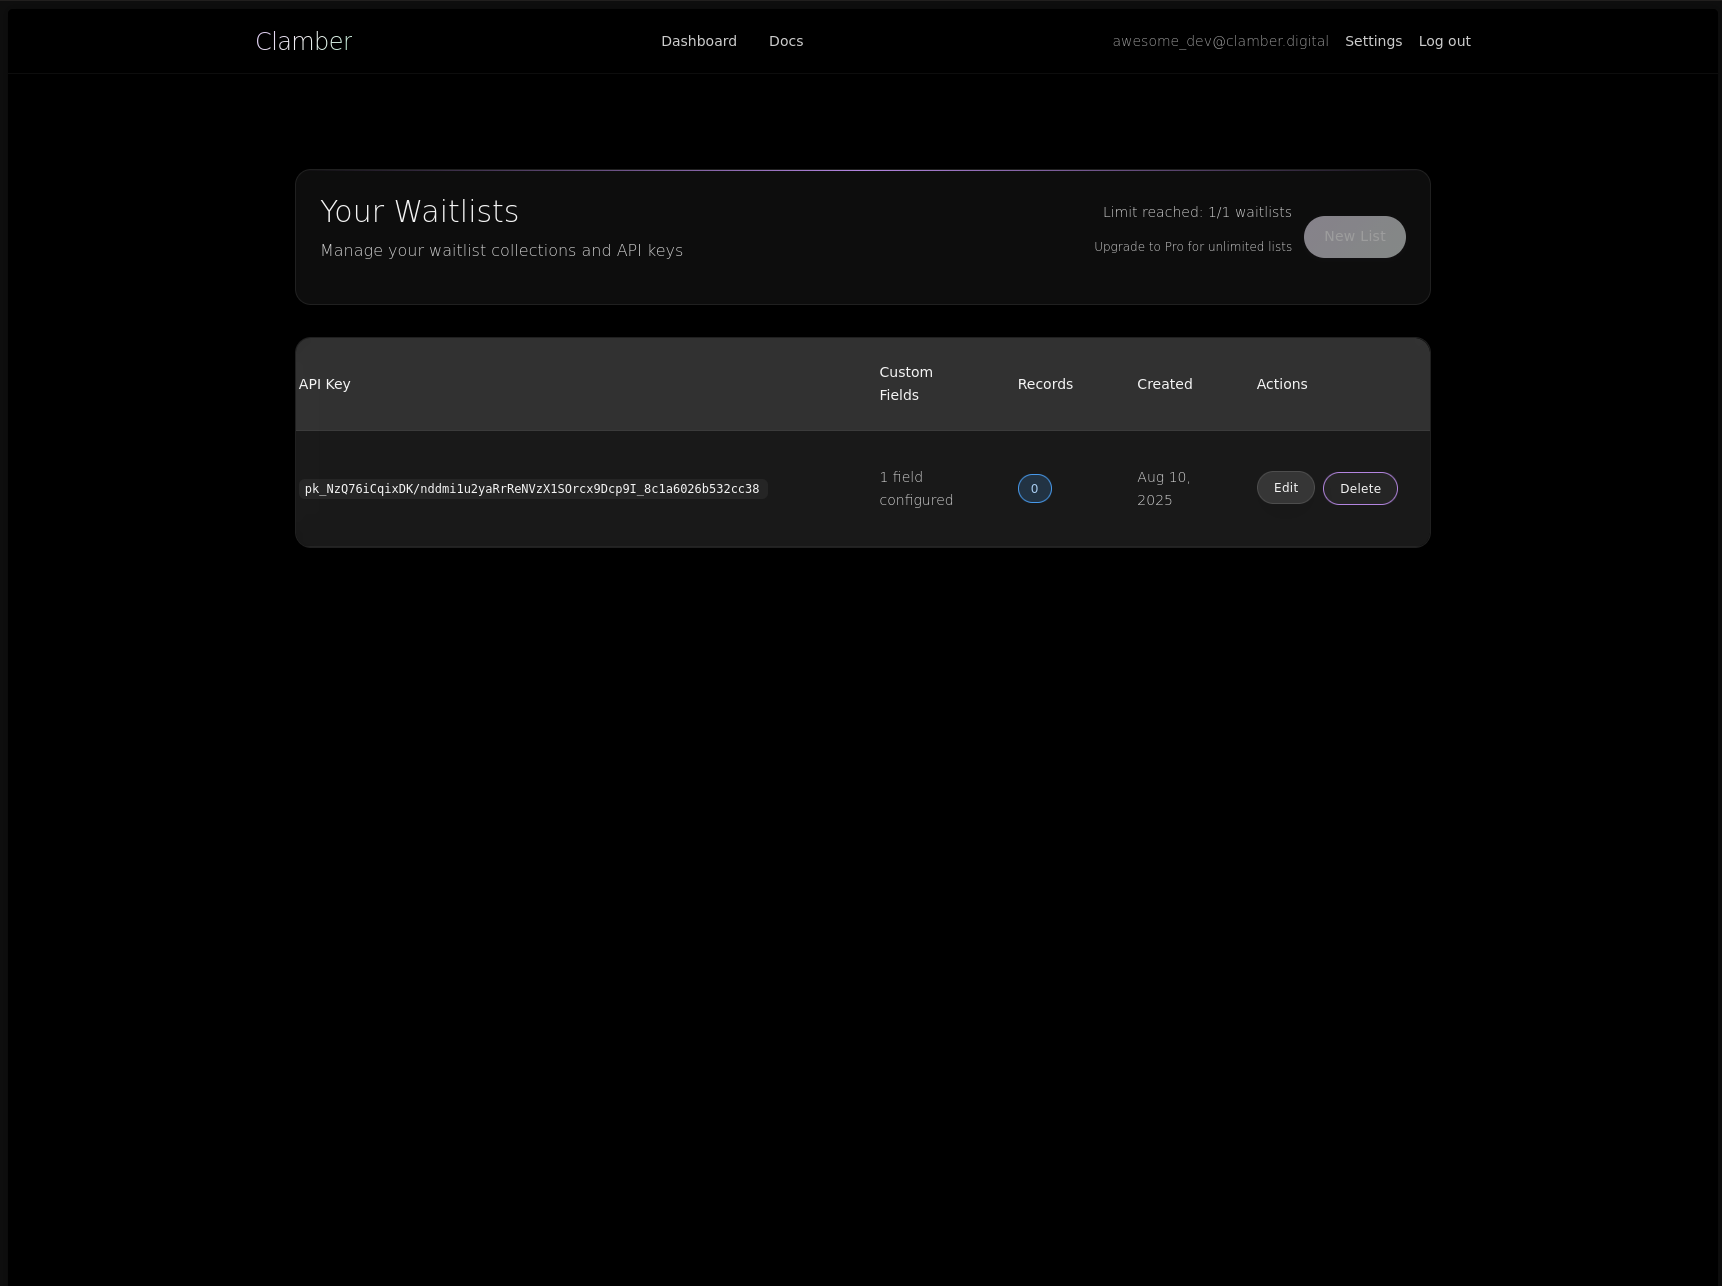
The ‘Edit’ and ‘Delete’ buttons are available by scrolling across the list table
Mastering Custom Fields
The Power of Structured Data Collection
Email addresses tell you who’s interested. Custom fields tell you why they’re interested and how to serve them best.
Designing Your Data Strategy
Before adding fields, consider your goals:
For Product Validation:
- Current solution they use
- Biggest pain point
- Budget range
- Team size
For Market Research:
- Industry/sector
- Job role
- Company size
- Geographic location
For Community Building:
- Expertise level
- Interests
- Preferred communication style
- Time zone
Configuring Custom Fields
Each waitlist supports up to 10 custom fields, giving you flexibility without overwhelming your prospects.
The only required field is a valid email. We have also included ‘first_name’ and ‘last_name’ as sensible defaults.
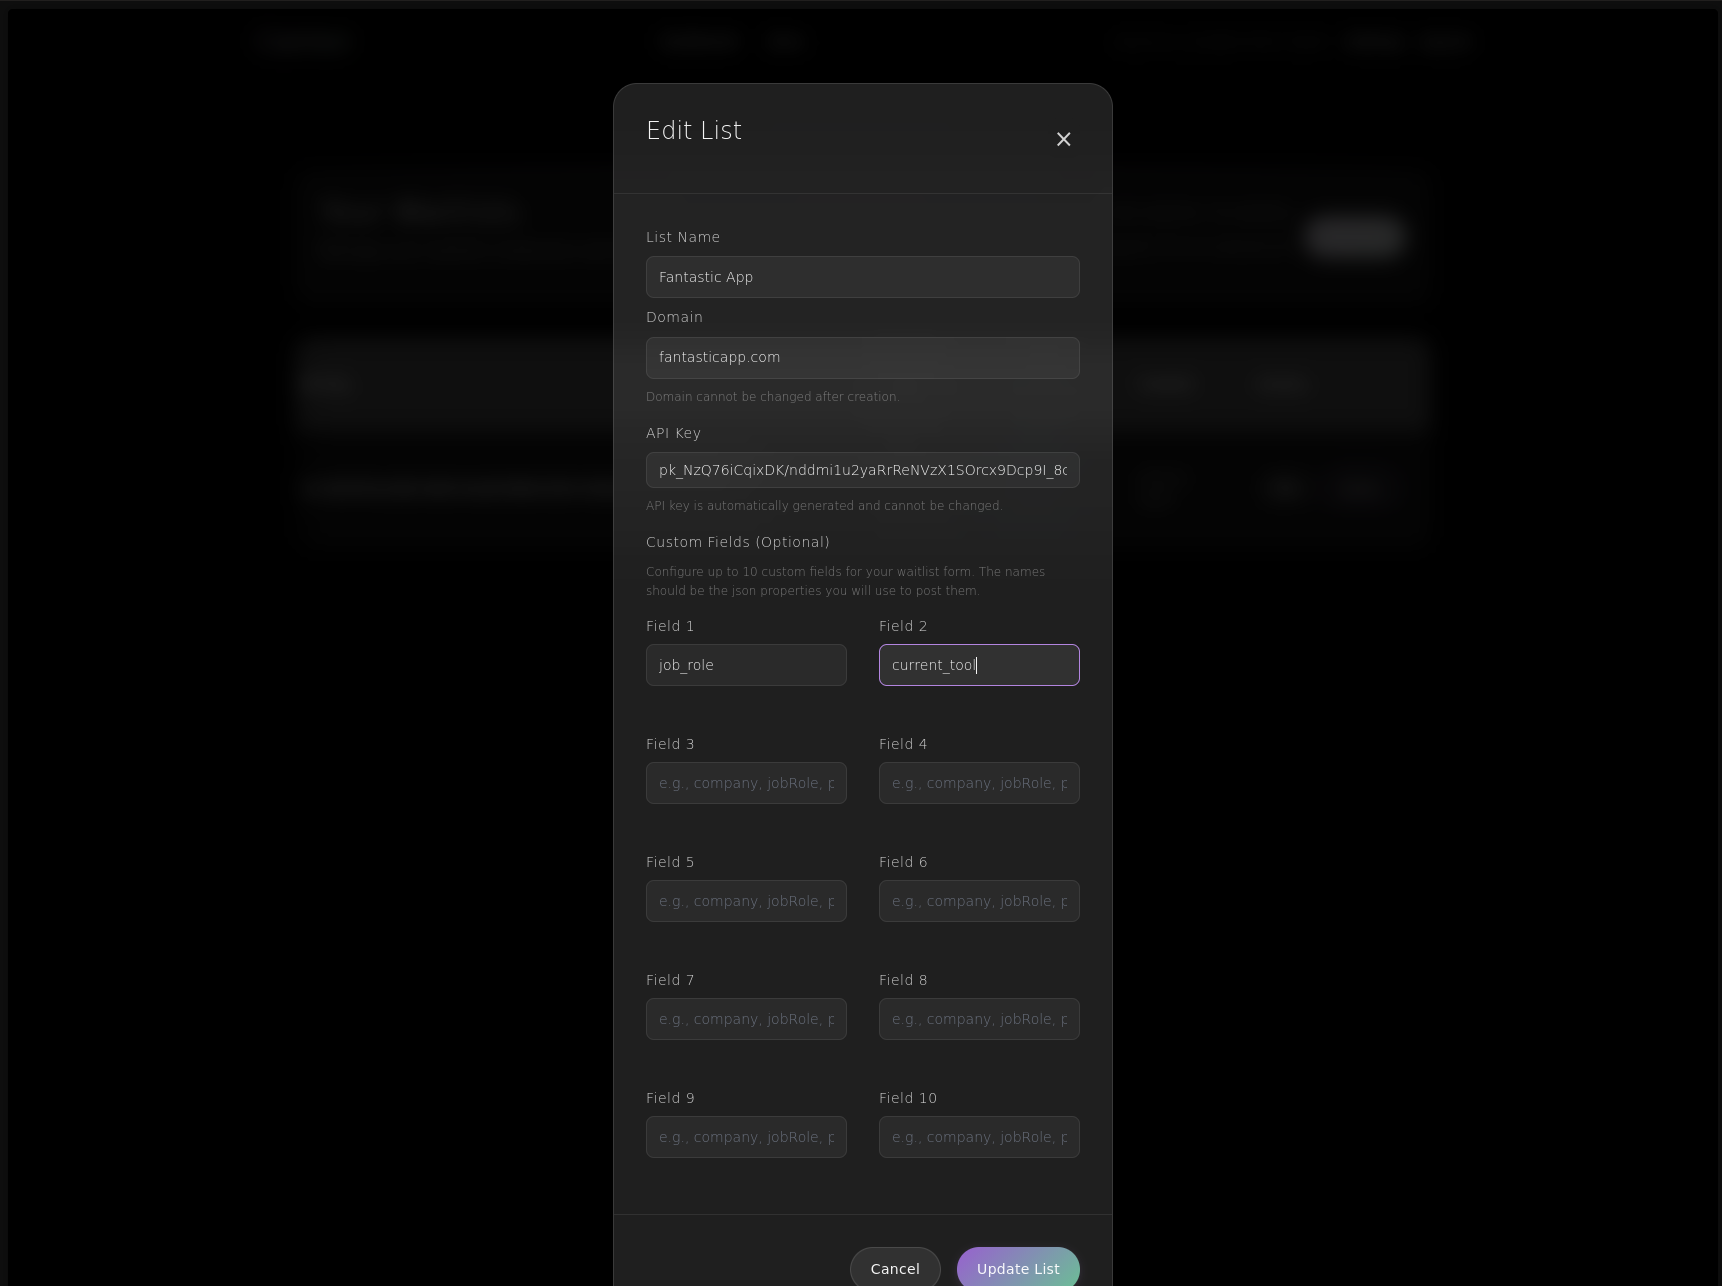
The field editing interface showing field name input
Field Naming Best Practices
Your field labels become the JSON keys in API requests, so choose wisely:
Good Field Names:
-
company– clear and concise -
budget_range– underscores are our standard -
currentSolution– camelCase for multi-word -
teamSize– descriptive but brief
Avoid:
-
Special characters (
company@name) -
Excessive length (
what_is_your_current_solution_for_this_problem) -
Generic names (
field1,custom1) -
Reserved words (
email,id,created_at)
The Technical Implementation
When you configure custom fields, they map directly to your API structure.
This means you can use your business logic in the api and not worry about mapping to custom_field_x.
Unconfigured fields will not be stored. So your structure should look something like:
// Your Configuration:
// Field 1: "company"
// Field 2: "role"
// Field 3: "budget"

// API Accepts:
{
  "email": "[email protected]",
  "first_name": "Sarah",
  "last_name": "Chen",
  "company": "TechStartup Inc",
  "role": "CTO",
  "budget": "10k-50k"
}
Progressive Data Collection
Start simple and expand based on what you learn:
Week 1-2: Minimal Fields
- Email only
- Monitor signup rate as baseline
Week 3-4: Add Context
- Add 1-2 fields most relevant to your hypothesis
- Compare signup rates
Week 5+: Optimize
- Add fields that segment your audience
- Remove fields with low completion rates
Remember: Every additional field is a small friction point. Make each one count.
API Integration Mastery
Understanding the Clamber API
Our API is designed with developer experience at its core – simple enough to implement in minutes, robust enough for production applications.
The appendix in the docs is a good place to look. But we have also built in docs to the empty lists to get you started.
This documentation updates based on the configured fields and domains with to make it as clear as possible:
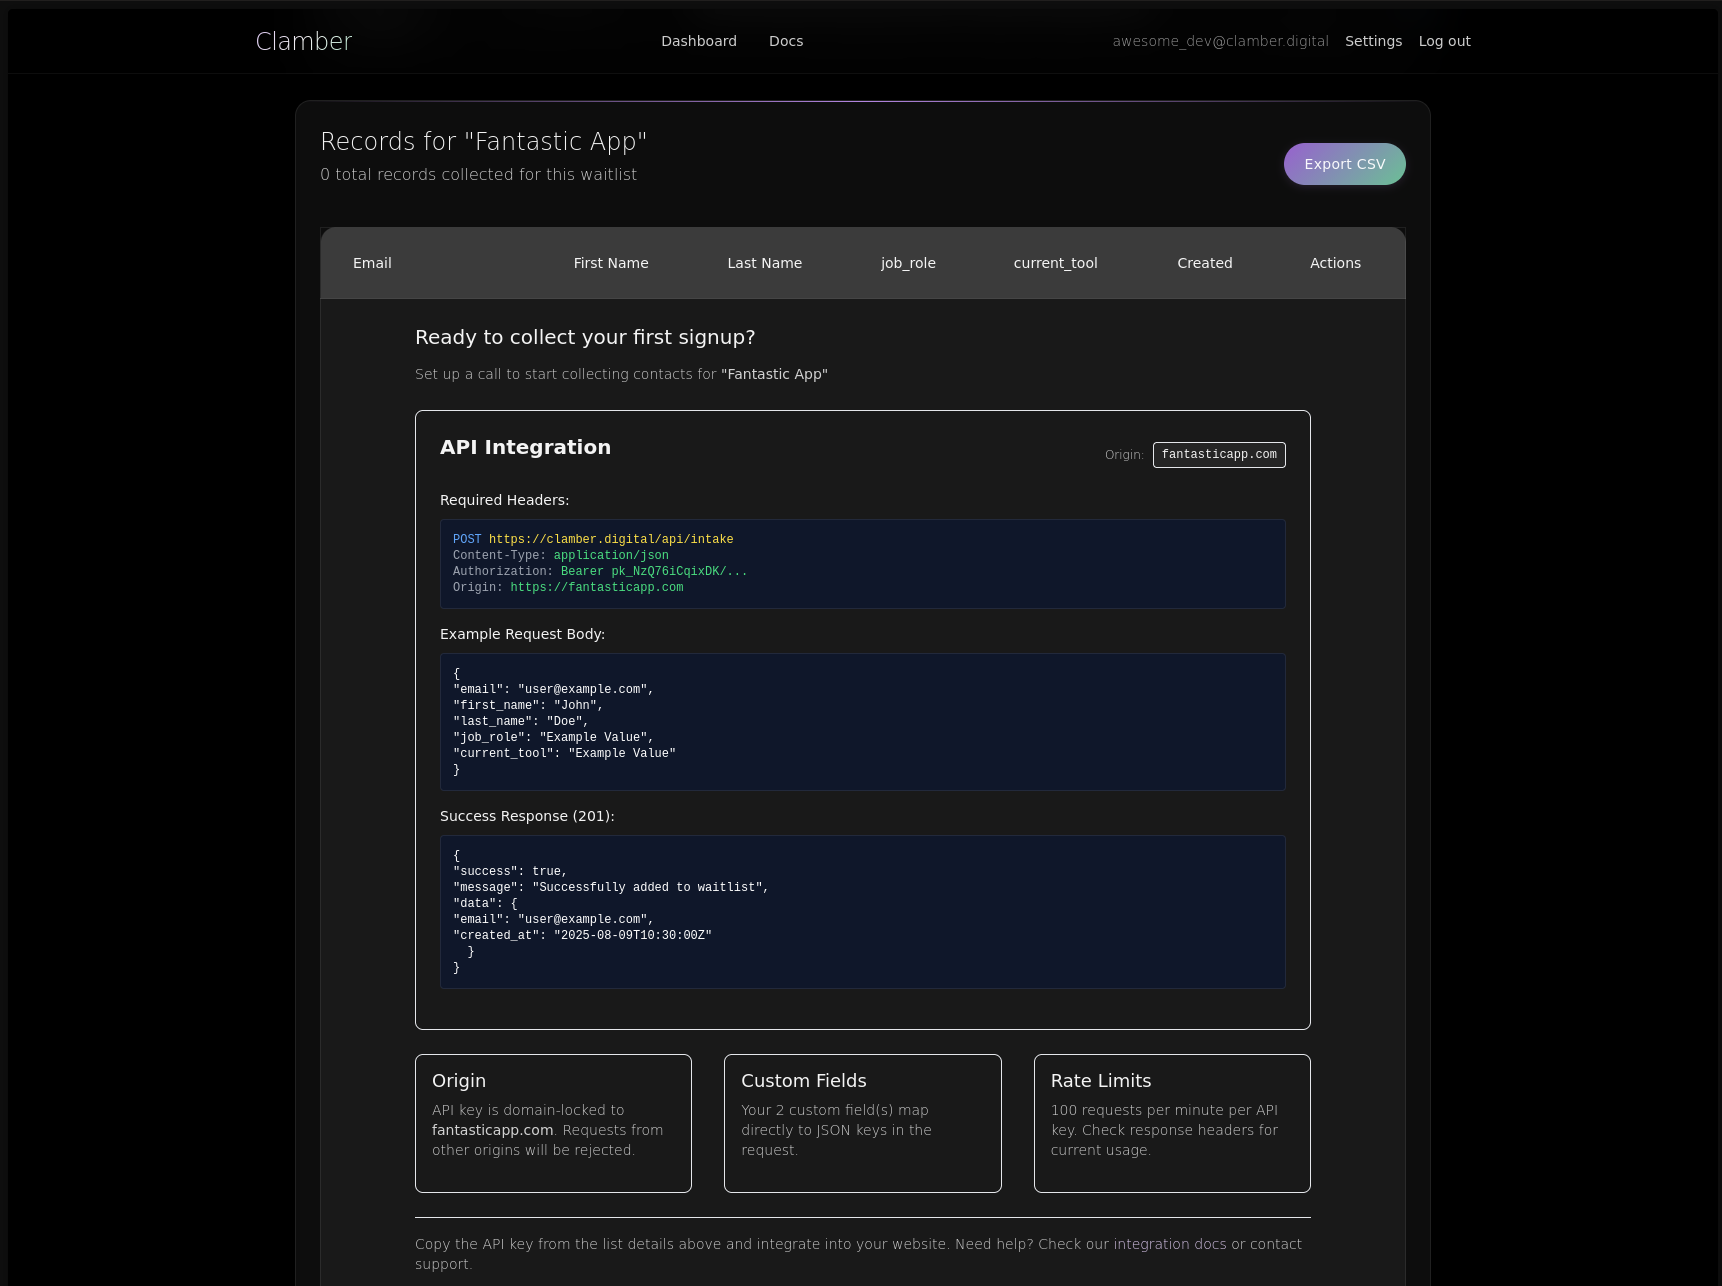
The API documentation page with endpoint, headers, and example requests clearly laid out
The Single Endpoint Philosophy
We believe in simplicity. One endpoint handles all your waitlist submissions:
POST https://clamber.digital/api/intakeThis design choice means:
- Less documentation to read
- Fewer integration points to maintain
- Consistent behavior across all lists
- Simplified error handling
Authentication and Security
Every API request requires three headers that work together to ensure security:
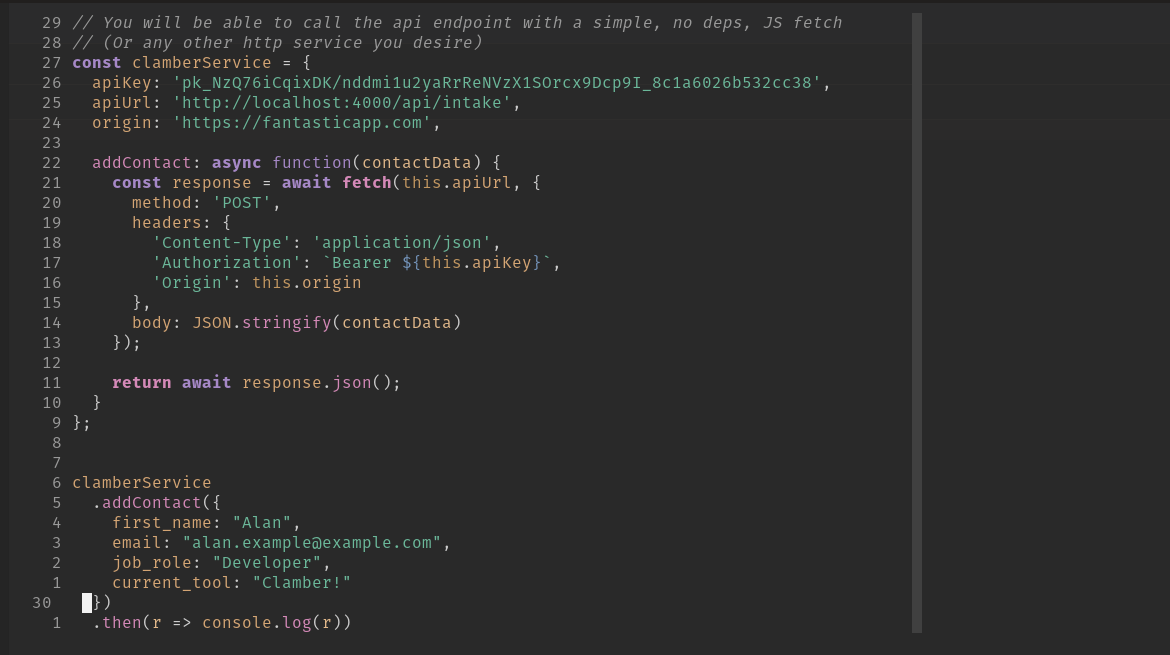
Code editor showing proper header configuration with annotations
Content-Type: application/json
Authorization: Bearer pk_your_api_key_here
Origin: https://your-domain.comContent-Type: Tells our server to expect JSON data
Authorization: Your domain-bound API key that identifies your waitlist
Origin: The domain making the request (must match your configured domain)
This triple-verification ensures that even if your API key is exposed, it can’t be used from unauthorized domains.
Now, as the developer in you might be noticing, the origin is spoofable (and can be used for development purposes and testing),
so this isn’t a guarantee that you won’t see any spam, but we’ve tried to add some friction for bots.
Request Formats: From Simple to Sophisticated
The Minimalist Approach
Sometimes, all you need is an email:
{
  "email": "[email protected]"
}
The Complete Picture
When you need rich data:
{
  "email": "[email protected]",
  "first_name": "Alex",
  "last_name": "Rivera",
  "company": "Growth Studios",
  "role": "Head of Product",
  "team_size": "10-50",
  "current_tool": "Competitor X",
  "budget": "1000-5000",
  "timeline": "Q1 2025",
  "referral_source": "ProductHunt"
}
Handling Responses Like a Pro
Success Responses (201 Created)
When everything goes right:
{
  "success": true,
  "message": "Successfully added to waitlist",
  "data": {
    "email": "[email protected]",
    "created_at": "2025-08-09T10:30:00Z"
  }
}
This response confirms:
- The signup was successful
- The exact timestamp of registration
- The email was properly received
Error Responses: Learning Opportunities
Every error response is designed to help you fix the issue quickly:
401 Unauthorized - Invalid API Key
{
  "success": false,
  "message": "Unauthorized: Invalid API key"
}
Solution: Check your API key format and spelling
403 Forbidden - Domain Mismatch
{
  "success": false,
  "message": "Forbidden: Domain not authorized"
}
Solution: Ensure Origin header matches configured domain
402 Payment Required - Limit Exceeded
{
  "success": false,
  "message": "Payment required: Contact limit exceeded"
}
Solution: Upgrade to Pro or clean up old contacts
422 Unprocessable Entity - Validation Failed
{
  "success": false,
  "message": "Validation failed",
  "errors": {
    "email": ["Invalid email format"],
    "company": ["Field too long (max 500 characters)"]
  }
}
Solution: Fix the specific field errors and retry
The result type for this is always consistent so there will be a sucess boolean, a message (which will be visible from the front end,
but that you might not want to publish directly to the user) and potentially errors or data. This format is designed for simple, functional handling.
Rate Limiting: Fair Use for Everyone
We implement intelligent rate limiting to ensure platform stability and reduce spamming:
- Limit: 100 requests per minute per API key
- Window: Rolling 60-second period
- Smart Recovery: Automatic reset as old requests expire
When you hit the limit:
429 Too Many Requests
Retry-After: 1800
X-RateLimit-Limit: 100
X-RateLimit-Remaining: 0
X-RateLimit-Reset: 1691580000
Best practices for handling rate limits:
- Implement exponential backoff
- Cache successful submissions client-side
- Batch requests when possible
- Monitor your usage patterns
- Protect your site or your key from bots
API Key Management and Security
The Anatomy of an API Key
Understanding how our API keys work helps you appreciate what they provide:
- Uniqueness: No two keys are ever the same
- Domain binding: Keys only work from your domain
- Type indication: PK keys are publishable and only able to write data.
- Cryptographic security: Cannot be reverse-engineered
- Rotatable: If your list is getting spammed you can create a new key
When and Why to Rotate Keys
Key rotation is a security best practice, but knowing when to do it is crucial:
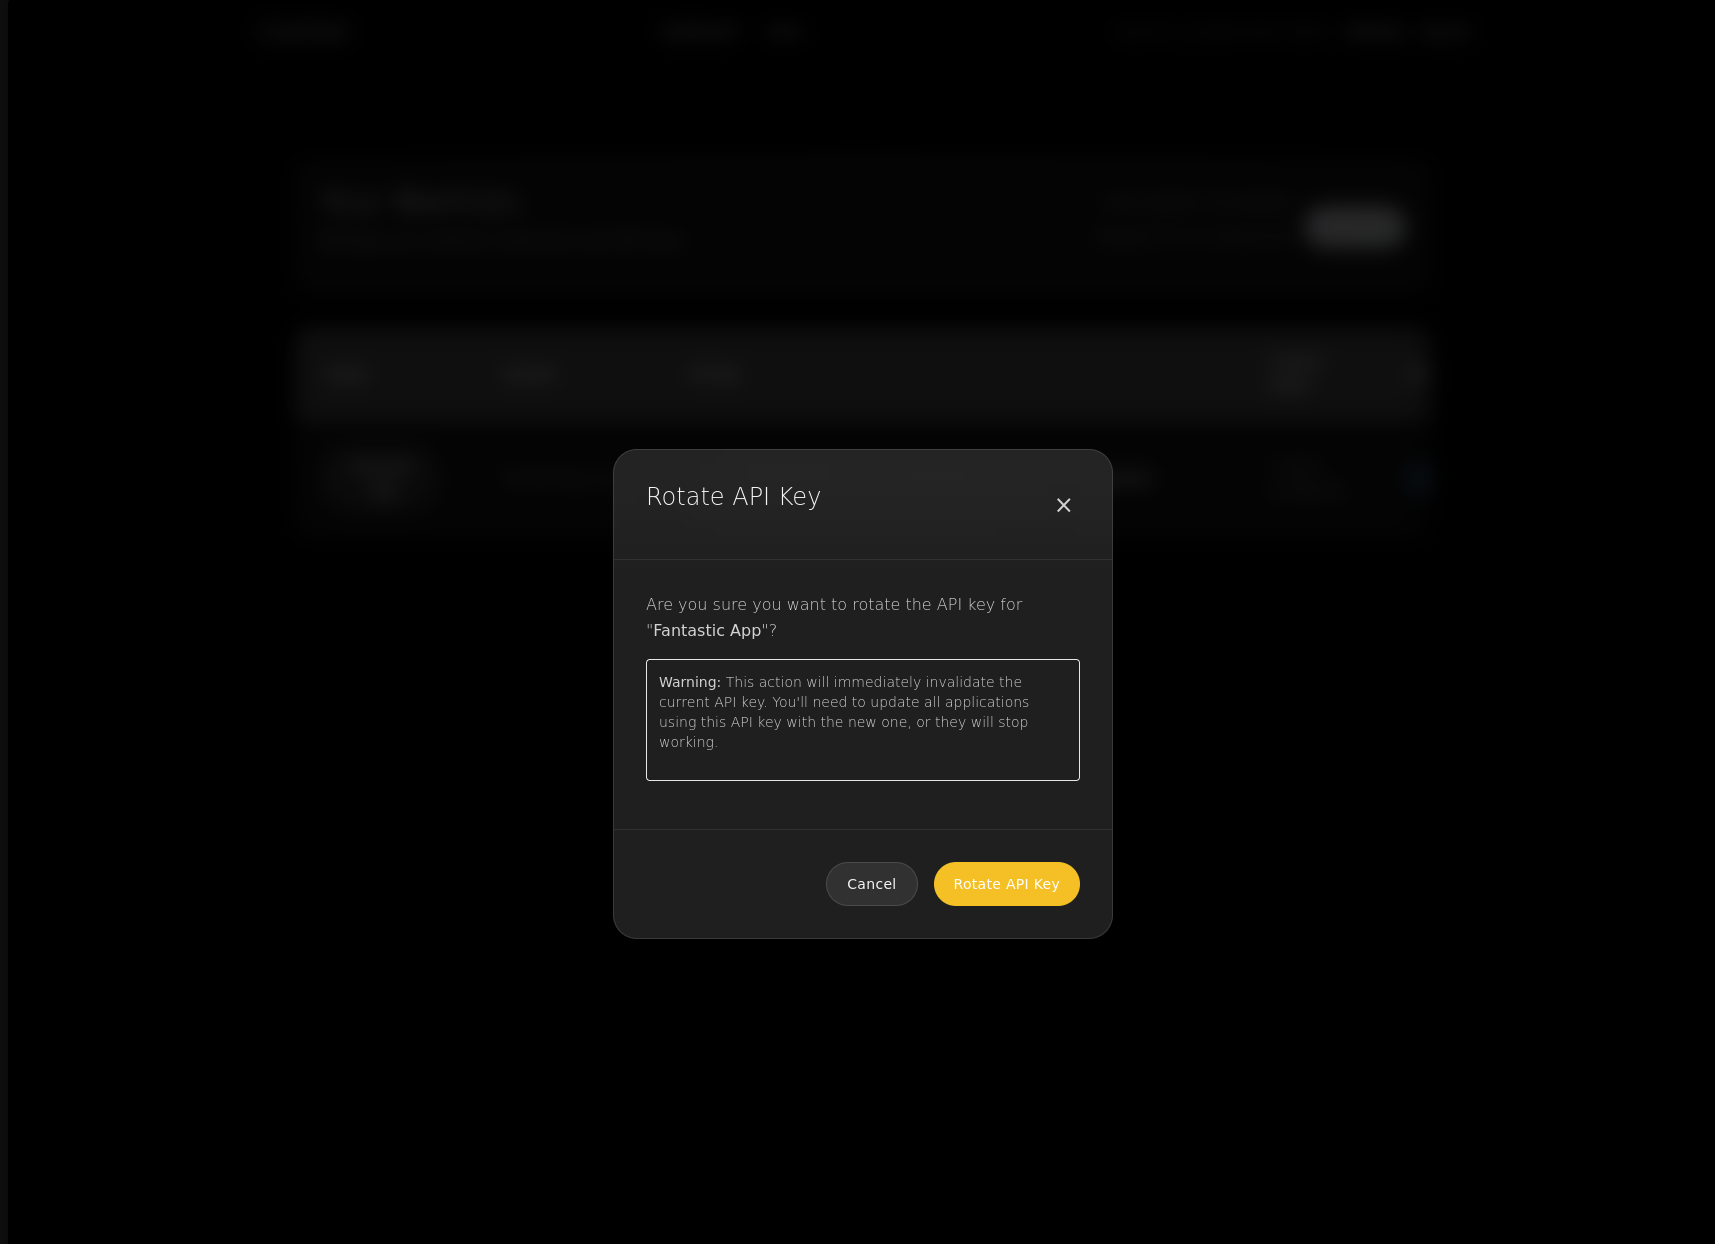
The rotation confirmation dialog with clear warnings about the implications
Consider Rotating When:
- It’s been more than 90 days since last rotation
- You’re implementing new security policies
- You’re changing your domain structure
- You’re conducting a security audit
- You get a backend and previously had an exposed key
The Rotation Process
Key rotation is designed to be swift but safe:
-
Initiate Rotation
- Click the rotation icon in your dashboard
- Read the warning carefully
- Confirm your intention
-
Immediate Effect
- Old key stops working instantly
- New key is generated with same domain binding
- All cached authentications are cleared
-
Update Your Integration
- Copy the new key
- Update your environment variables
- Deploy the changes
- Test thoroughly
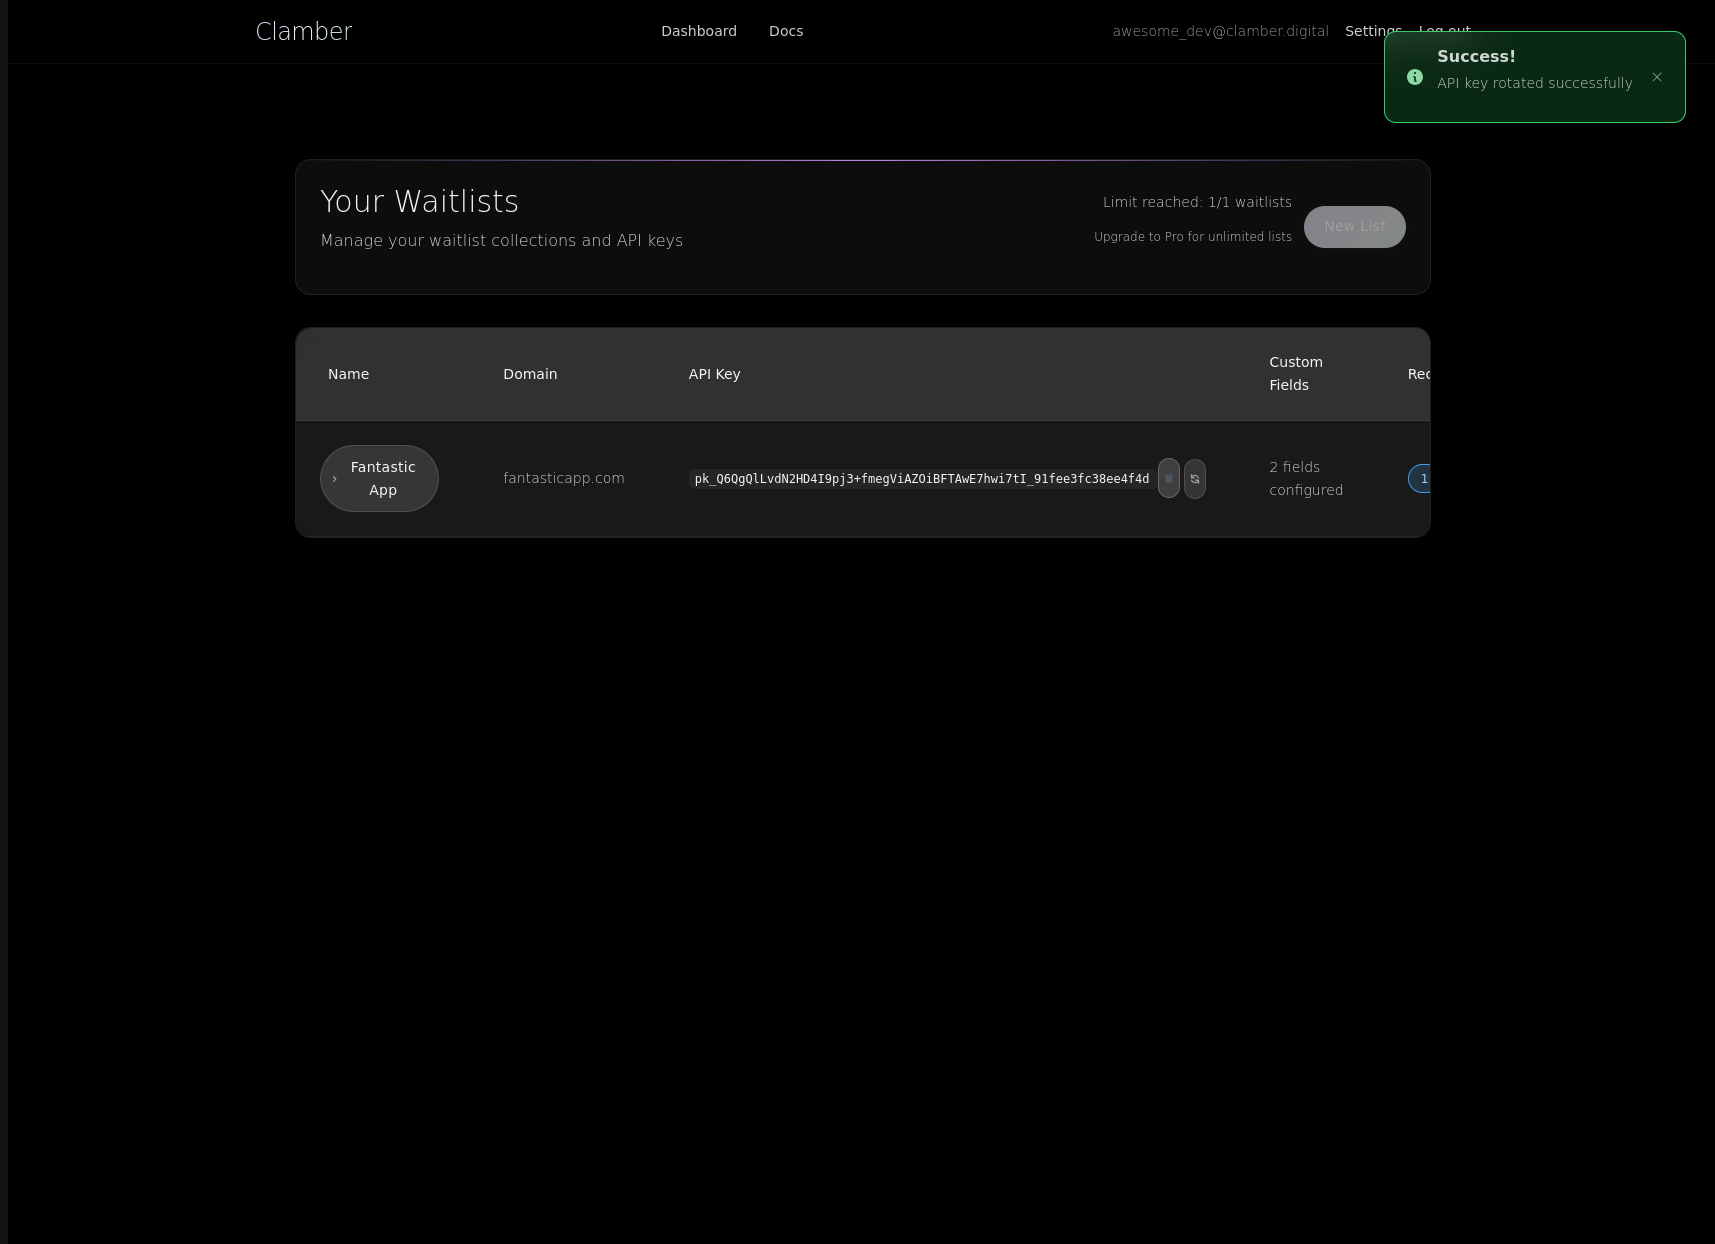
Success notification showing the new API key with copy button
Security Best Practices
Storage Guidelines
If you have a backend, standard procedures apply
Do:
- Store keys in environment variables
- Use secret management services (AWS Secrets Manager, Vault)
- Implement different keys for different environments
- Document which services use which keys
Don’t:
- Hardcode keys in source files
- Share keys via email or messaging apps
- Use the same key for development and production
- Store keys in client-side code
However, we wanted to create something where the keys could be published for quick validation
That means, while you might get some unwanted entries, from smart bots that can add origins or malicious users,
the keys cannot read any of the data in your lists or account. That means that they can be shared in the front-end.
So, while a server side setup is preferred, there is no REAL danger in having the key compromised.
Access Control
Limit who can see and rotate your API keys:
- Use team accounts with appropriate permissions
- Maintain an access log
- Review access quarterly
- Revoke access immediately when needed
Domain Security Deep Dive
The domain binding is our anti-spam net:
Scenario 1: Your Legitimate Request
-
Request from
yoursite.comwith your API key → ✅ Accepted
Scenario 2: Attempted Misuse
-
Request from
hackersite.comwith your API key → ❌ Rejected
This means even if your API key is exposed, it’s useless to attackers unless they can are spoofing you origin. This is obviously possible but
probably not worth the effort.
Managing Your Contacts
The Contact Dashboard
Your contacts are more than email addresses – they’re the early believers in your vision. The dashboard gives you a way to see them online.
Viewing and Understanding Contact Data
Each contact record shows the info you collect:
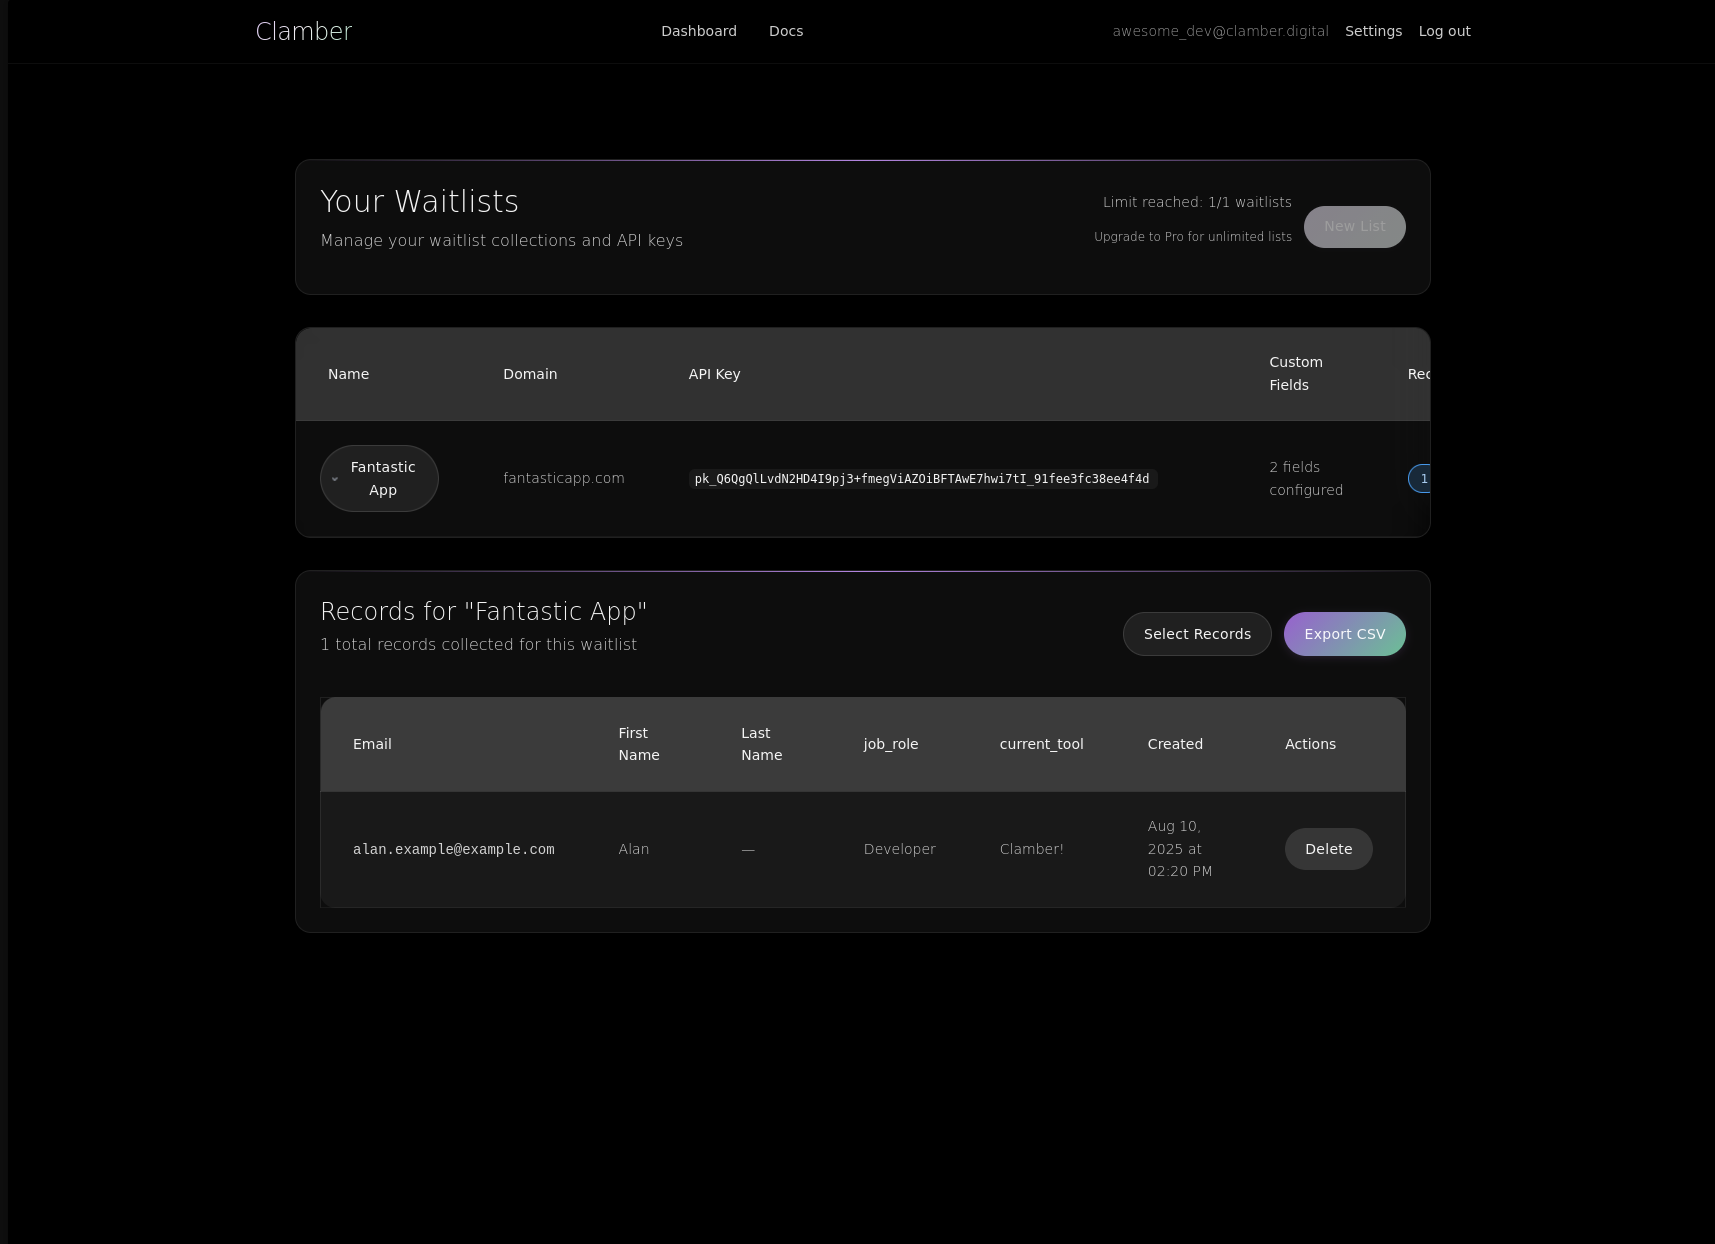
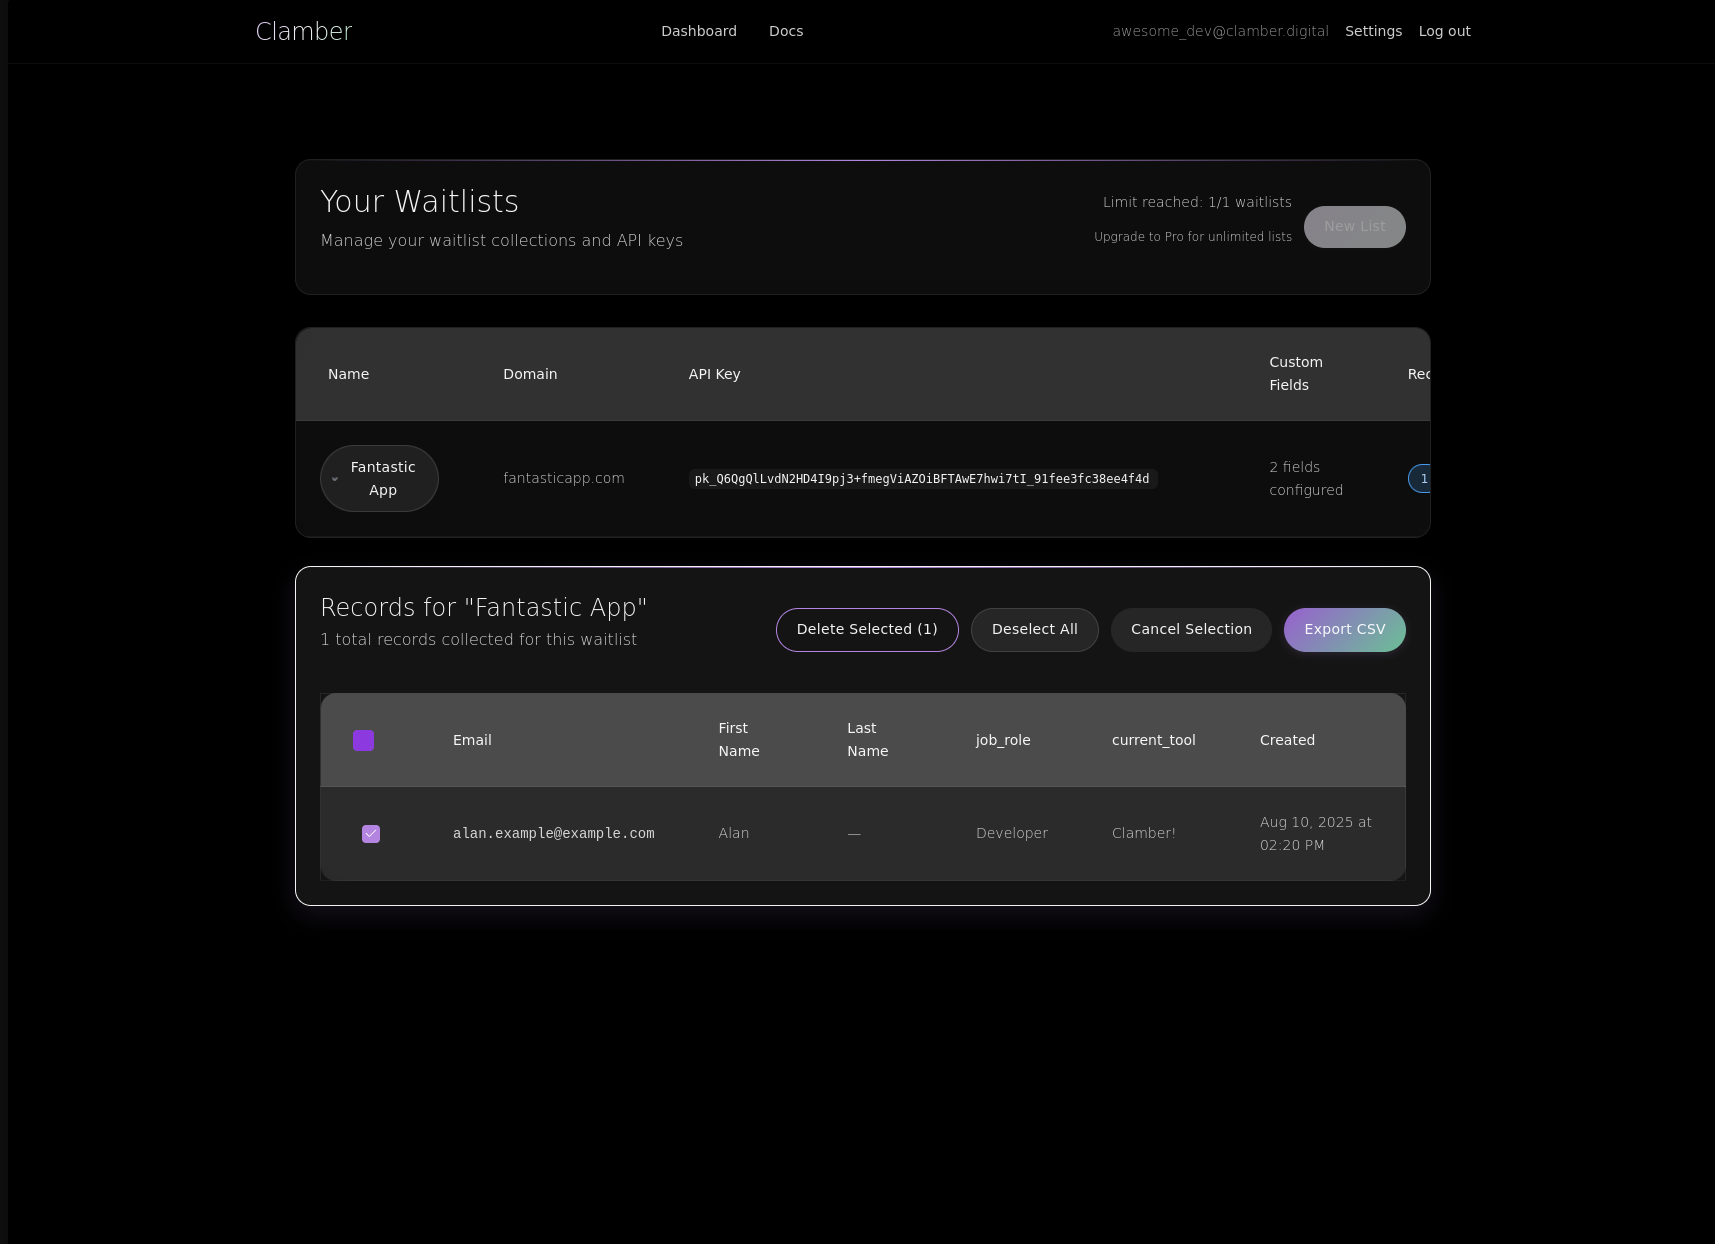
Expanded view of a waitlist showing individual contacts with all custom fields
Standard Fields:
- Email: The primary identifier, unique per list
- Name: First and last, when provided
- Created: Exact timestamp of signup
Custom Fields:
Your configured fields appear as columns, making patterns visible at a glance.
Bulk Operations
When you need to manage multiple contacts:
-
Enable Selection Mode
- Click “Select” in the toolbar
- Checkboxes appear next to each contact
-
Choose Your Contacts
- Click individual checkboxes
- Or use “Select All” for the current page
-
Apply Your Action
- Export selected
- Delete selected (with confirmation)
Multiple contacts selected with bulk action toolbar visible
Understanding Contact Limits
Free Plan Users:
Your progress bar shows exactly where you stand:
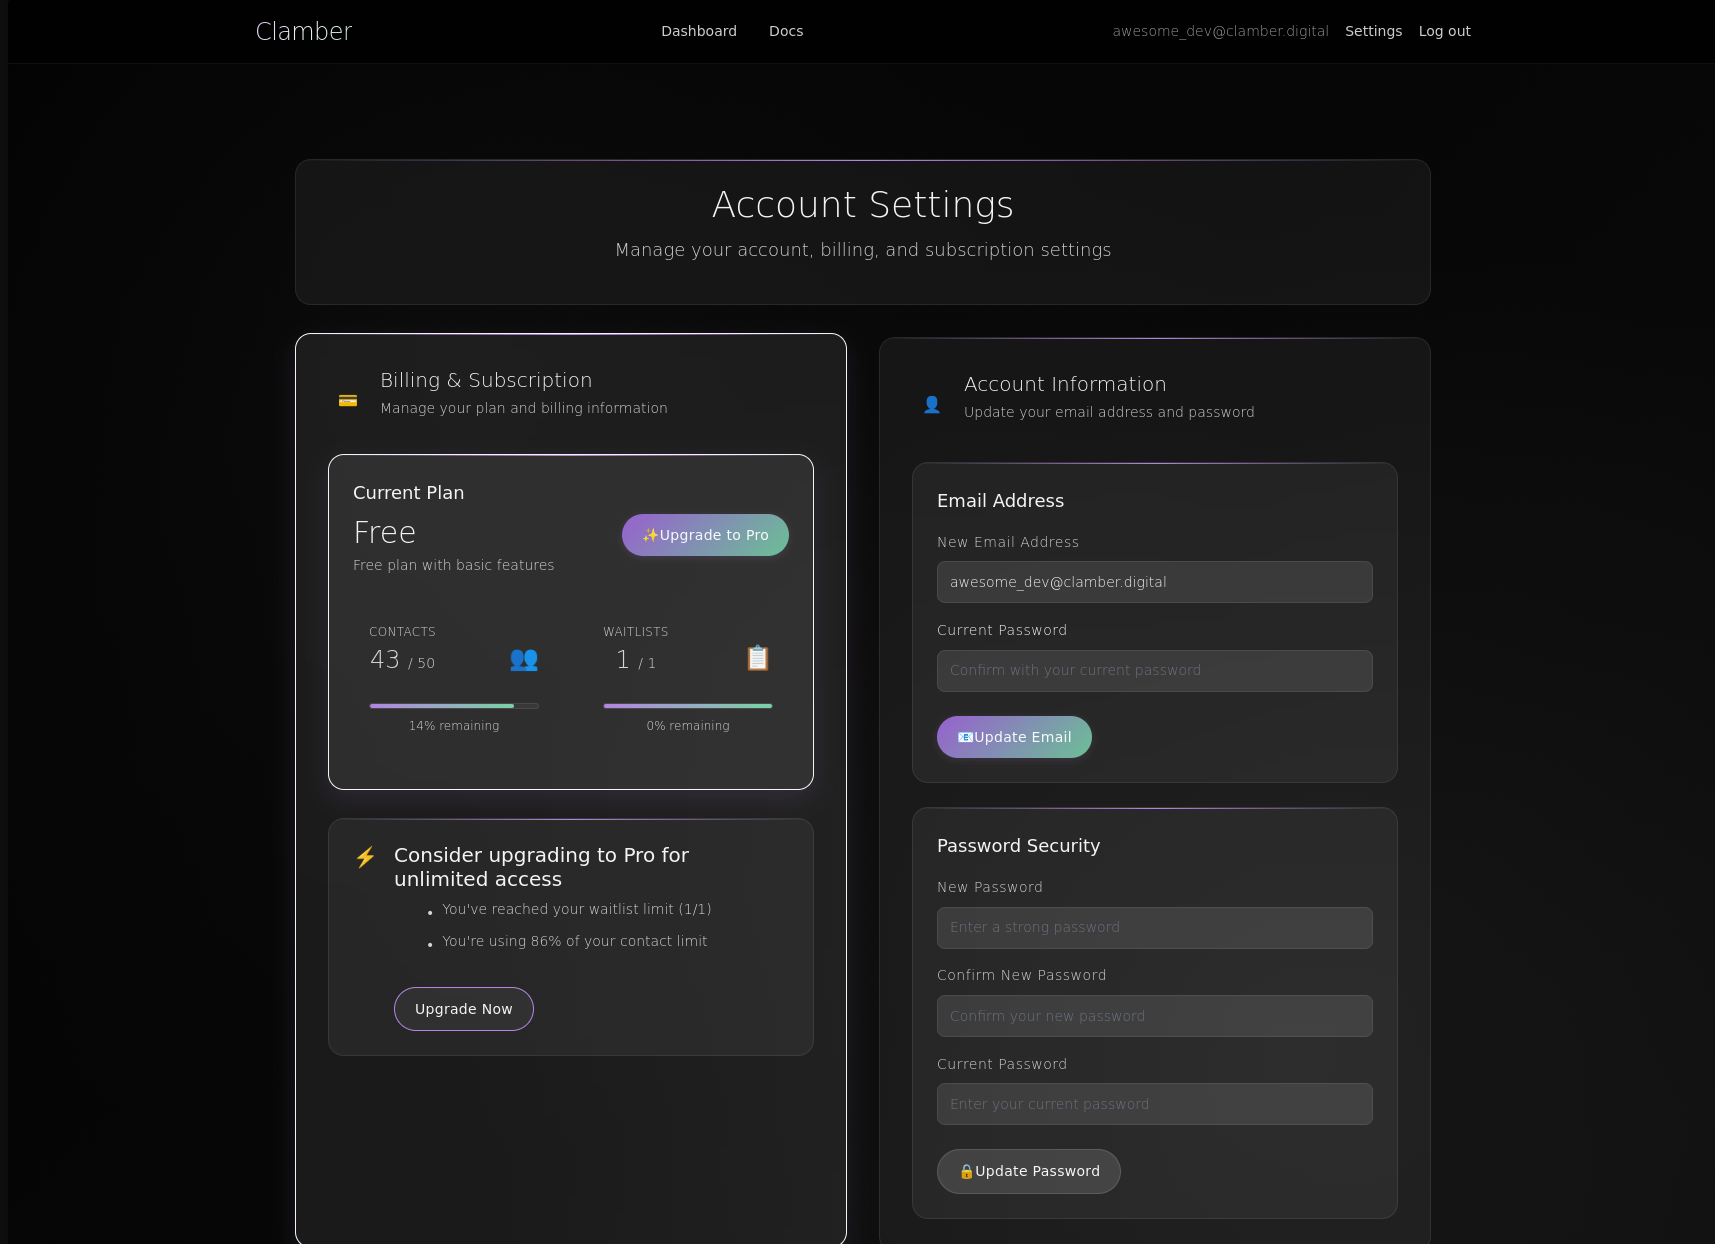
Progress bar showing “42 of 50 contacts used” with visual indicator
When approaching your limit:
- At 80% (40 contacts): Yellow warning appears
- At 90% (45 contacts): Email notification sent
- At 100% (50 contacts): New signups receive a friendly “list full” message
Pro Plan Users:
No limits, just insights!
Contact Quality and Validation
We automatically validate and clean contact data:
Data Sanitization:
- HTML/script tag removal
- SQL injection prevention
Some data might get caught accidentally by our filters but we take our server’s security seriously.
Exporting Your Data
Your Data, Your Freedom
We believe your data should never be held hostage. Export functionality is a first-class feature, not an afterthought.

The prominent “Export CSV” button in the waitlist interface
The Export Process
Exporting is straightforward and instant:
-
Navigate to Your Waitlist
- Open your dashboard
- Expand the desired waitlist
-
Click Export
- The “Export CSV” button is always visible
- No hidden menus or complex workflows
-
Automatic Download
- File downloads immediately
- Named with your list and timestamp
-
Example:
product-launch-2025-08-09.csv

Success message confirming the export with download location
Understanding Your Export
The CSV format is universal and imports cleanly into any tool:

Exported CSV opened in a spreadsheet application showing all columns
Standard Columns:
Email, First Name, Last Name, Created At
Custom Field Columns:
Your custom fields appear with the exact labels you configured:
company, role, Budget, team_size, currentSolutionExample Export:
Email,First Name,Last Name,company,role,Created At
[email protected],Sarah,Chen,TechCo,CTO,2025-08-09T10:30:00Z
[email protected],Mike,Johnson,Creative Agency,Founder,2025-08-09T11:15:00Z
Import Destinations
Your exported data works seamlessly with popular tools and will work anywhere that can accept CSV
Advanced Export Strategies
Segmented Exports
While we export all contacts, you can segment post-export:
- Export your complete list
- Open in your spreadsheet tool
- Filter by custom fields
- Save separate CSVs for each segment
Automated Processing
For developers, exported CSVs can be programmatically processed:
import pandas as pd

# Load your export
df = pd.read_csv('waitlist-export.csv')

# Segment by interest
high_value = df[df['Budget'] == '10k+']
developers = df[df['Role'].str.contains('Developer')]

# Prepare for different campaigns
high_value.to_csv('high-value-leads.csv')
developers.to_csv('developer-audience.csv')
Data Portability Promise
Our commitment to data portability:
- No Export Limits: Export as often as you need
- Complete Data: Every field, every contact, always
- Standard Format: CSV works everywhere
- No Vendor Lock-in: Leave anytime with your data
- GDPR Compliant: Full data portability rights
Developer Integration Guide
Building Your Integration
Let’s walk through implementing Clamber in your application, from simple HTML forms to sophisticated React components.
HTML Form Integration
The simplest approach for static sites:
<!-- Your landing page form -->

<form id="waitlist-form" class="signup-form">
  <input type="email" name="email" required
         placeholder="Enter your email">
  <input type="text" name="firstName"
         placeholder="First name (optional)">
  <input type="text" name="company"
         placeholder="Company (optional)">
  <button type="submit">Join Waitlist</button>
  <div id="message" class="hidden"></div>
</form>

<script>
document.getElementById('waitlist-form')
  .addEventListener('submit', async (e) => {
    e.preventDefault();

    const formData = new FormData(e.target);
    const data = Object.fromEntries(formData);

    try {
      const response = await fetch('https://clamber.digital/api/intake', {
        method: 'POST',
        headers: {
          'Content-Type': 'application/json',
          'Authorization': 'Bearer YOUR_API_KEY',
          'Origin': 'https://your-domain.com'
        },
        body: JSON.stringify(data)
      });

      const result = await response.json();

      if (response.ok) {
        showMessage('Success! You\'re on the list.', 'success');
        e.target.reset();
      } else {
        showMessage(result.message, 'error');
      }
    } catch (error) {
      showMessage('Something went wrong. Please try again.', 'error');
    }
  });

function showMessage(text, type) {
  const messageEl = document.getElementById('message');
  messageEl.textContent = text;
  messageEl.className = `message ${type}`;
}
</script>
React Component Integration
For modern React applications:
import { useState } from 'react';

function WaitlistForm() {
  const [formData, setFormData] = useState({
    email: '',
    firstName: '',
    company: '',
    role: ''
  });
  const [status, setStatus] = useState('idle');
  const [message, setMessage] = useState('');

  const handleSubmit = async (e) => {
    e.preventDefault();
    setStatus('loading');

    try {
      const response = await fetch('https://clamber.digital/api/intake', {
        method: 'POST',
        headers: {
          'Content-Type': 'application/json',
          'Authorization': `Bearer ${process.env.REACT_APP_CLAMBER_KEY}`,
          'Origin': window.location.origin
        },
        body: JSON.stringify(formData)
      });

      const result = await response.json();

      if (response.ok) {
        setStatus('success');
        setMessage('Welcome aboard! Check your email for updates.');
        setFormData({ email: '', firstName: '', company: '', role: '' });
      } else {
        setStatus('error');
        setMessage(result.message);
      }
    } catch (error) {
      setStatus('error');
      setMessage('Network error. Please try again.');
    }
  };

  return (
    <form onSubmit={handleSubmit} className="waitlist-form">
      <input
        type="email"
        required
        value={formData.email}
        onChange={(e) => setFormData({...formData, email: e.target.value})}
        placeholder="Your email"
        disabled={status === 'loading'}
      />

      <input
        type="text"
        value={formData.firstName}
        onChange={(e) => setFormData({...formData, firstName: e.target.value})}
        placeholder="First name (optional)"
        disabled={status === 'loading'}
      />

      <input
        type="text"
        value={formData.company}
        onChange={(e) => setFormData({...formData, company: e.target.value})}
        placeholder="Company (optional)"
        disabled={status === 'loading'}
      />

      <button type="submit" disabled={status === 'loading'}>
        {status === 'loading' ? 'Joining...' : 'Join Waitlist'}
      </button>

      {message && (
        <div className={`message ${status}`}>{message}</div>
      )}
    </form>
  );
}
Next.js API Route Pattern
For Next.js applications, proxy through an API route for added security,
this kind of server side pattern means that your key is much less likely to be spammed:
// pages/api/waitlist.js or app/api/waitlist/route.js
export async function POST(request) {
  const data = await request.json();

  // Add server-side validation here
  if (!data.email || !isValidEmail(data.email)) {
    return Response.json(
      { success: false, message: 'Valid email required' },
      { status: 400 }
    );
  }

  try {
    const response = await fetch('https://clamber.digital/api/intake', {
      method: 'POST',
      headers: {
        'Content-Type': 'application/json',
        'Authorization': `Bearer ${process.env.CLAMBER_API_KEY}`,
        'Origin': process.env.NEXT_PUBLIC_URL
      },
      body: JSON.stringify(data)
    });

    const result = await response.json();

    return Response.json(result, { status: response.status });
  } catch (error) {
    console.error('Waitlist API error:', error);
    return Response.json(
      { success: false, message: 'Server error' },
      { status: 500 }
    );
  }
}
Testing Your Integration
Development Testing
-
Environment Setup
# .env.local CLAMBER_API_KEY=pk_dev_key_here NEXT_PUBLIC_URL=http://localhost:3000 -
Test Cases
- ✅ Valid email submission
- ✅ Duplicate email handling
- ✅ Invalid email format
- ✅ Missing required fields
- ✅ Network error simulation
- ✅ Rate limit handling
-
Browser Testing
- Chrome, Firefox, Safari, Edge
- Mobile responsiveness
- Slow network conditions
- JavaScript disabled fallback
Production Deployment
Before going live:
-
Update Configuration
- Production API key
- Production domain
- Error tracking setup
- Analytics integration
-
Security Audit
- API key not exposed in client code
- HTTPS enforced
- CORS properly configured
- Input validation on both client and server
-
Monitoring Setup
- Error tracking (Sentry, Rollbar)
- Success rate monitoring
- Performance metrics
- User feedback collection
Advanced Patterns
Retry Logic with Exponential Backoff
async function submitWithRetry(data, maxRetries = 3) {
  let lastError;

  for (let i = 0; i < maxRetries; i++) {
    try {
      const response = await fetch('https://clamber.digital/api/intake', {
        method: 'POST',
        headers: {
          'Content-Type': 'application/json',
          'Authorization': `Bearer ${process.env.CLAMBER_API_KEY}`,
          'Origin': window.location.origin
        },
        body: JSON.stringify(data)
      });

      if (response.status === 429) {
        // Rate limited, wait and retry
        const retryAfter = response.headers.get('Retry-After') || 60;
        await new Promise(resolve => setTimeout(resolve, retryAfter * 1000));
        continue;
      }

      return await response.json();
    } catch (error) {
      lastError = error;
      // Exponential backoff: 1s, 2s, 4s
      await new Promise(resolve => setTimeout(resolve, Math.pow(2, i) * 1000));
    }
  }

  throw lastError;
}
Troubleshooting Guide
When Things Don’t Go As Expected
Even the best systems encounter issues. This comprehensive troubleshooting guide helps you diagnose and resolve problems quickly.
API Integration Issues
401 Unauthorized Error
Symptoms:
- API returns “Unauthorized: Invalid API key”
- All requests fail immediately
Diagnosis Steps:
-
Check API key format (should start with
pk_) - Verify key hasn’t been rotated recently
- Ensure Authorization header includes “Bearer “ prefix
- Confirm key corresponds to correct waitlist
Solutions:
// ❌ Common mistakes
headers: {
  'Authorization': 'pk_abc123'  // Missing "Bearer" prefix
  'Authorization': 'Bearer pk_abc123 '  // Extra space at end
  'Authorization': 'bearer pk_abc123'  // Lowercase "bearer"
}

// ✅ Correct format
headers: {
  'Authorization': 'Bearer pk_abc123_8f7e6d5c'
}
403 Forbidden - Domain Mismatch
Symptoms:
- API returns “Forbidden: Domain not authorized”
- Works in development but not production (or vice versa)
Common Causes:
-
Subdomain mismatch:
www.site.comvssite.com -
Protocol included: Entering
https://site.cominstead ofsite.com -
Trailing slash:
site.com/instead ofsite.com - Wrong environment: Using dev key in production
Solutions:
- Verify exact domain in your waitlist settings
- Check Origin header matches exactly
- Remember: subdomains are different domains
- Create separate waitlists for different environments
422 Validation Errors
Symptoms:
- Some fields accepted, others rejected
- Error details in response body
Common Validation Issues:
// Email validation
"test@"           // ❌ Incomplete
"[email protected]"       // ❌ Missing domain
"test@email"      // ❌ Missing TLD
"[email protected]"  // ✅ Valid

// Field length limits
"company": "A".repeat(501)  // ❌ Exceeds 500 char limit
"company": "Acme Corporation"  // ✅ Within limits

// Unknown fields
{
  "email": "[email protected]",
  "customField": "value"  // ❌ Field not configured
}
429 Rate Limiting
Symptoms:
- Requests suddenly start failing
- “Too Many Requests” error
- Retry-After header present
Best Practices:
- Implement client-side duplicate detection
- Add exponential backoff
- Respect Retry-After header
- Consider caching successful submissions
// Smart rate limit handling
if (response.status === 429) {
  const retryAfter = parseInt(response.headers.get('Retry-After') || '60');
  console.log(`Rate limited. Retry after ${retryAfter} seconds`);

  // Show user-friendly message
  showMessage(`High demand! Please try again in ${retryAfter} seconds.`);

  // Optional: Auto-retry after delay
  setTimeout(() => retrySubmission(data), retryAfter * 1000);
}
Dashboard Issues
Waitlists Not Loading
Quick Fixes:
-
Hard refresh:
Ctrl+Shift+R(Windows) orCmd+Shift+R(Mac) - Clear browser cache for clamber.digital
- Try incognito/private mode
- Check browser console for errors
If Problem Persists:
- Check system status page
- Try different browser
- Disable browser extensions
- Contact support with console errors
Custom Fields Not Saving
Symptoms:
- Fields appear to save but revert
- Error message about invalid characters
Valid Field Names:
✅ "company"
✅ "team_size"
✅ "teamSize"
✅ "current solution"

❌ "company@work"  // Special character
❌ "team-size"     // Hyphen not recommended
❌ ""              // Empty field
❌ "email"         // Reserved word
Export Not Downloading
Common Causes:
- Pop-up blocker: Check browser’s address bar for blocked pop-up indicator
- Download folder full: Check available disk space
- Browser settings: Verify download location settings
Account and Billing Issues
Can’t Log In
For GitHub OAuth Users:
- Ensure you’re logged into GitHub
- Check GitHub’s status page
- Try revoking and re-authorizing Clamber in GitHub settings
- Clear cookies for both clamber.digital and github.com
For Email/Password Users:
- Check for typos in email address
- Use password reset if forgotten
- Check spam folder for reset email
- Ensure account is verified (check for verification email)
- Accounts are locked after multiple failed attempts and you will be notified by email
Subscription Not Activating
After Successful Payment:
- Allow up to 60 seconds for activation
- Refresh your dashboard
- Check billing page for subscription status
- Verify payment completed in Stripe
If Issues Persist:
- Note your Stripe payment ID
- Screenshot your receipt
- Contact [email protected]
Getting Help
Self-Service Resources
Before contacting support, try:
- This Guide: Re-read relevant sections
- Dashboard Messages: Check for system notifications
- Browser Console: Look for JavaScript errors
- Network Tab: Inspect API requests/responses
Contacting Support
Email: [email protected]
Include in Your Message:
- Your account email
- Specific error messages
- Screenshots if applicable
- Steps to reproduce the issue
- Browser and OS information
For API Issues, Also Include:
- Request example
- Response headers and body
- Timestamp of failed request
- Your domain configuration
Response Times:
- Free Plan: When we can
- Pro Plan: Within 24 hours (priority)
- Critical issues: Same day
Best Practices and Pro Tips
Conversion Optimization
The Progressive Disclosure Method
Start with minimal friction, then gradually request more information:
Week 1: Email Only
<input type="email" required placeholder="Get early access">Baseline conversion rate: 25-35%
Week 2: Add Value Context
<input type="email" required placeholder="Get early access">
<input type="text" placeholder="Your biggest challenge (optional)">
Typical conversion rate: 20-30%
Week 3: Segment for Relevance
<input type="email" required placeholder="Get early access">
<select>
  <option>I'm a developer</option>
  <option>I'm a designer</option>
  <option>I'm a founder</option>
</select>
Typical conversion rate: 18-25%
Copy That Converts
High-Converting CTA Examples:
- “Get Early Access” (28% avg conversion)
- “Join 500+ Developers” (26% avg conversion)
- “Reserve Your Spot” (24% avg conversion)
- “Be First to Know” (23% avg conversion)
Lower-Performing CTAs:
- “Submit” (12% avg conversion)
- “Sign Up” (15% avg conversion)
- “Register” (14% avg conversion)
Custom Field Strategy
The 80/20 Rule of Data Collection
Focus on fields that drive decisions:
High-Value Fields:
// These fields directly impact your product decisions
{
  "currentSolution": "What tool do you use today?",
  "painPoint": "What's your biggest challenge?",
  "teamSize": "How many people on your team?",
  "budget": "What's your budget range?"
}
Low-Value Fields:
// These rarely influence decisions
{
  "favoriteColor": "What's your favorite color?",
  "yearsExperience": "Years of experience?",
  "timezone": "Your timezone?"  // (you can derive from IP)
}
Security Best Practices
API Key Hygiene
Development Workflow:
# .env.development
CLAMBER_API_KEY_DEV=pk_dev_key_here

# .env.production
CLAMBER_API_KEY_PROD=pk_prod_key_here

# .env.example (commit this)
CLAMBER_API_KEY_DEV=your_dev_key_here
CLAMBER_API_KEY_PROD=your_prod_key_here
Key Rotation Schedule:
- Development keys: Monthly
- Production keys: Quarterly
- After any team changes: Immediately
- After security incidents: Immediately
Input Validation Layers
Implement validation at multiple levels:
// Client-side (immediate feedback)
function validateEmail(email) {
  const regex = /^[^\s@]+@[^\s@]+\.[^\s@]+$/;
  return regex.test(email);
}

// Server-side (never trust client)
app.post('/api/waitlist', (req, res) => {
  const { email } = req.body;

  if (!validateEmail(email)) {
    return res.status(400).json({ error: 'Invalid email' });
  }

  // Additional validation...
  if (containsSQLInjection(email)) {
    logSecurityEvent('SQL_INJECTION_ATTEMPT', { email });
    return res.status(400).json({ error: 'Invalid input' });
  }

  // Forward to Clamber API...
});
Performance Optimization
Caching Strategies
Our API responses are cached for maximum performance, but you can optimize further:
// Browser-side deduplication
const submittedEmails = new Set();

async function submitToWaitlist(email, data) {
  // Check if already submitted in this session
  if (submittedEmails.has(email)) {
    return {
      success: true,
      message: 'Already on the waitlist!',
      cached: true
    };
  }

  const response = await fetch('/api/waitlist', {
    method: 'POST',
    body: JSON.stringify({ email, ...data })
  });

  if (response.ok) {
    submittedEmails.add(email);
  }

  return response.json();
}
Async Loading Pattern
Don’t let waitlist forms slow down your page:
<!-- Load form script asynchronously -->

<script async src="/js/waitlist-form.js"></script>

<!-- Form works even without JavaScript -->

<form action="/api/waitlist" method="POST">
  <input type="email" name="email" required>
  <button type="submit">Join Waitlist</button>
</form>
Growth Hacking Your Waitlist
The Viral Loop
Encourage sharing after signup:
// After successful signup
function showSuccessMessage(email) {
  const message = `
    <div class="success-message">
      <h3>You're on the list!</h3>
      <p>You're #${position} in line</p>

      <div class="share-buttons">
        <a href="${twitterShareUrl}" target="_blank">
          Share on Twitter for early access
        </a>
        <button onclick="copyReferralLink()">
          Copy your referral link
        </button>
      </div>
    </div>
  `;

  displayMessage(message);
}
Post-signup sharing interface with social buttons and referral link
Segmentation for Engagement
Use custom fields to create segments:
Developer Segment:
- Technical updates
- API documentation early access
- Beta testing invitations
Business Segment:
- ROI calculators
- Case studies
- Pricing announcements
Early Adopter Segment:
- Exclusive features
- Founding member pricing
- Direct access to founders
Monitoring and Analytics
Key Metrics to Track
Growth Metrics:
- Daily/weekly signups
- Conversion rate by source
- Geographic distribution
- Custom field completion rates
Quality Metrics:
- Email validation failure rate
- Duplicate attempt rate
- API error rate
- Time to first signup
Engagement Metrics:
- Export frequency
- Dashboard login frequency
- API usage patterns
- Support ticket volume
Setting Up Alerts
Configure monitoring for critical events:
// Monitor conversion drops
if (conversionRate < THRESHOLD) {
  alert('Conversion rate dropped below 15%');
}

// Track API failures
if (apiErrorRate > 0.01) {
  alert('API error rate exceeds 1%');
}

// Watch for suspicious activity
if (signupsPerMinute > 100) {
  alert('Potential bot activity detected');
}
Planning for Launch Day
Pre-Launch Checklist
Two Weeks Before:
- [ ] Upgrade to Pro plan if expecting high volume
- [ ] Test API integration thoroughly
- [ ] Set up monitoring and alerts
- [ ] Prepare welcome email sequence
- [ ] Create backup export schedule
One Week Before:
- [ ] Rotate API keys
- [ ] Clear test data
- [ ] Verify custom fields are final
- [ ] Test export functionality
- [ ] Brief support team
Launch Day:
- [ ] Monitor dashboard in real-time
- [ ] Watch for rate limiting
- [ ] Track conversion rates
- [ ] Respond to issues immediately
- [ ] Celebrate milestones!
Handling Traffic Spikes
Our infrastructure scales automatically, but you should:
-
Implement queue on your side:
const queue = []; let processing = false; async function queueSubmission(data) { queue.push(data); if (!processing) { processQueue(); } } async function processQueue() { processing = true; while (queue.length > 0) { const data = queue.shift(); await submitToWaitlist(data); await sleep(100); // Rate limiting protection } processing = false; } -
Show progress to users:
<div class="queue-status">
You're being added to the waitlist...
<span class="position">#1,847 in queue</span>
</div>
Conclusion: Your Launch Awaits
You’re Ready to Build Your Waitlist
Congratulations on completing this comprehensive guide! You now have everything you need to create, manage, and grow successful waitlists with Clamber.
Your Journey From Here
Immediate Next Steps:
-
Create Your First Waitlist
- Log into your dashboard
- Click “New List”
- Configure your custom fields
- Grab your API key
-
Integrate with Your Site
- Add the form to your landing page
- Test with a few submissions
- Monitor your dashboard
-
Launch and Learn
- Share with your audience
- Watch the signups flow in
- Export and engage your early adopters
Remember Our Core Promises
- Your data is yours: Export anytime, no questions asked
- Transparent pricing: Free to start, €10/month to scale
- Developer-first: Clean APIs, great documentation
- Security built-in: Domain-bound keys, comprehensive validation
- Performance matters: Sub-15ms responses with caching
Getting Support
We’re here to help you succeed:
- Documentation: Always at docs.clamber.digital
- Email Support: [email protected]
- Pro Priority: Faster responses for Pro subscribers
- Community: Join other builders in our Discord
Share Your Success
We love hearing from our users. When you launch:
- Tag us on Twitter: @QuatedDev
- Share your metrics and learnings
- Help us improve with your feedback
Final Thoughts
Every successful product started with a simple waitlist. Yours could be next. The infrastructure is ready, the tools are in your hands, and your future customers are waiting to discover what you’re building.
Welcome to Clamber. Let’s build something amazing together.
Appendix: Quick Reference
API Endpoint
POST https://clamber.digital/api/intakeRequired Headers
Content-Type: application/json
Authorization: Bearer your_api_key
Origin: https://your-domain.com
Response Codes
-
201: Success - Contact added -
401: Unauthorized - Invalid API key -
403: Forbidden - Domain mismatch -
402: Payment Required - Limit exceeded -
409: Conflict - Duplicate email -
422: Unprocessable - Validation error -
429: Too Many Requests - Rate limited
Field Limits
- Email: Required, valid format
- Names: Optional, 255 characters max
- Custom fields: 500 characters max each
- API calls: 100 per minute per key
Support Contacts
- Email: [email protected]
- Documentation: docs.clamber.digital
- Status: status.clamber.digital
Thank you for choosing Clamber. This guide is continuously updated based on user feedback and new features. Last updated: August 2025